The Unforgettable Magic of Hershey’s Cocoa Fudge: Your Definitive Guide to Sweet Perfection and Beyond
Imagine a confection so rich, so smooth, so utterly decadent, it melts on your tongue, transporting you to a realm of pure, unadulterated bliss. A treat that evokes cherished childhood memories, the warmth of a bustling kitchen, and the simple joy of sharing something truly special. For many, that iconic sensation belongs to one timeless creation: Hershey’s Cocoa Fudge. But what if we told you that the perfect batch of this beloved classic isn’t just about following a recipe? What if there were hidden secrets, scientific nuances, and profound historical threads woven into every velvety bite? Prepare to unlock the ultimate guide to mastering Hershey’s Cocoa Fudge, transforming it from a mere dessert into an exquisite culinary experience that will leave everyone craving more.
ADVERTISEMENT
From the first waft of rich chocolate aroma filling your kitchen to the moment that first square dissolves on your palate, this article promises a deep dive into the heart of fudge perfection. We’re not just offering instructions; we’re unveiling the psychology behind its irresistible pull, the precise science that guarantees success, and ingenious ways to elevate your creations far beyond the ordinary. Get ready to discover why this humble cocoa-based confection has captivated generations and how you can harness its power to delight, impress, and even forge unforgettable connections.
A Journey into Sweet Nostalgia: Why Hershey’s Cocoa Fudge Endures
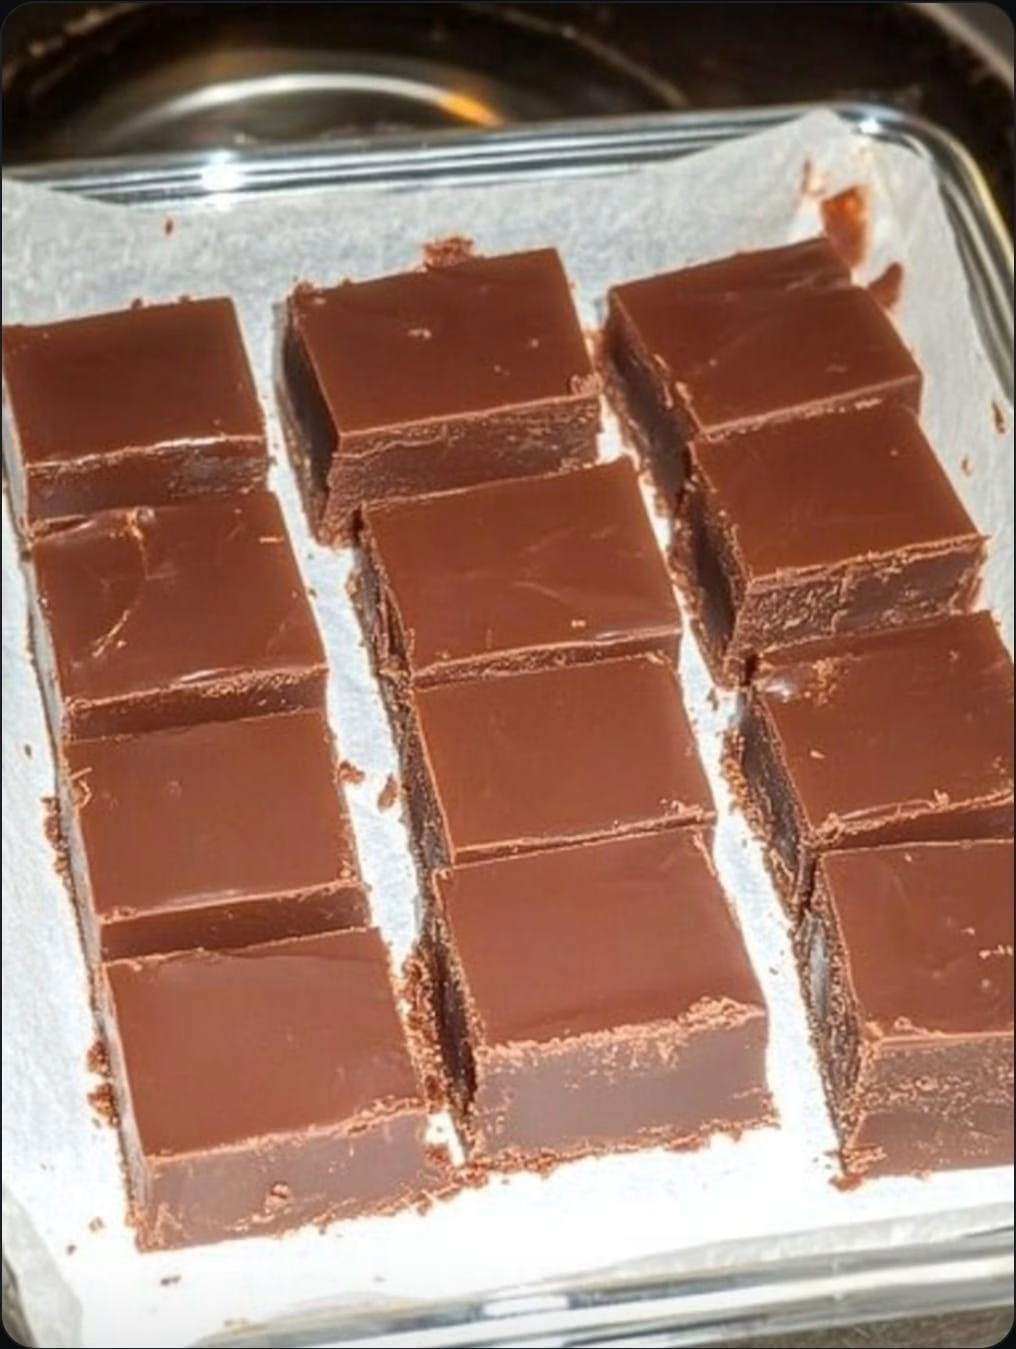
The very mention of “Hershey’s Cocoa Fudge” conjures a vivid tapestry of sensory delights: the deep, inviting aroma of chocolate, the glistening sheen of perfectly set squares, and the satisfying give as you bite into its creamy interior. This isn’t just a recipe; it’s a cultural touchstone, a comforting presence in countless households across the UK and USA. Its enduring popularity isn’t accidental; it’s rooted in a unique blend of accessibility, nostalgic charm, and an almost alchemical ability to transform simple ingredients into something truly extraordinary.
For many, making Hershey’s Cocoa Fudge is a rite of passage, a cherished tradition passed down through generations. It’s the scent of holidays, the centerpiece of bake sales, and the unexpected gift that always brings a smile. But why does this specific type of fudge, built upon the foundation of Hershey’s classic cocoa, hold such a potent grip on our collective culinary consciousness? The answer lies in its perfect balance of robust chocolate flavor, unparalleled smoothness when made correctly, and a comforting familiarity that transcends fleeting food trends. It’s a testament to the power of a simple, well-executed classic.
ADVERTISEMENT
The Allure of Homemade Fudge: More Than Just a Dessert
In an age of instant gratification and mass-produced treats, the act of making homemade fudge stands as a quiet rebellion. It’s an embrace of patience, precision, and the pure joy of creation. Homemade Hershey’s Cocoa Fudge offers a level of customization and freshness that store-bought varieties simply cannot match. You control the quality of every ingredient, from the butter to the vanilla extract, ensuring a superior taste and texture that truly shines.
Moreover, the process itself is deeply rewarding. The bubbling of the sugar mixture, the transformation as it cools, and the rhythmic beat of the spoon as the fudge comes together are all part of an engaging culinary dance. It’s a meditative experience, a chance to slow down and create something tangible and delicious. This intrinsic value, far beyond mere consumption, is a significant part of homemade fudge’s enduring appeal. But beyond the personal satisfaction, there’s a fascinating history that underpins every batch of this beloved treat.
The Hershey’s Legacy: A Tale of Chocolate Innovation
To truly appreciate Hershey’s Cocoa Fudge, one must first acknowledge the monumental legacy of the Hershey Company itself. Founded by Milton S. Hershey in 1894, the company revolutionized chocolate production, making it accessible to the masses. Before Hershey, chocolate was largely a luxury item. Milton Hershey’s vision transformed it into an everyday indulgence, building an empire on the principle of affordable, high-quality confections.
Hershey’s cocoa powder, the cornerstone of this particular fudge, is renowned for its distinctive, slightly acidic flavor profile, which contributes to the fudge’s signature depth and complexity. It’s a flavor that has become synonymous with American chocolate, a taste embedded in the culinary fabric of generations. This unique characteristic is not just a matter of branding; it’s a carefully cultivated outcome of their specific processing methods, known as “Dutching” or alkali treatment, which neutralizes some of the cocoa’s natural acidity, resulting in a darker color and milder flavor. Understanding this heritage is crucial, but the real magic lies in the fascinating science that transforms these simple ingredients into something truly extraordinary.
ADVERTISEMENT
The Science of Seduction: Understanding Fudge Chemistry
Fudge, at its core, is a delicate dance of sugar crystallization. It’s not just mixing ingredients; it’s about controlling a molecular process to achieve that perfect, melt-in-your-mouth texture. Many home cooks struggle with fudge, often producing gritty, crumbly, or overly soft batches, unaware that the culprit isn’t necessarily their cooking skills but a misunderstanding of the fundamental science at play. Unlocking the secrets to consistently perfect Hershey’s Cocoa Fudge involves a deep appreciation for the interplay between sugar, fat, and temperature.
This section will peel back the layers of mystification, revealing the precise scientific principles that govern fudge making. Once you grasp these concepts, you’ll not only be able to troubleshoot common problems with ease but also confidently experiment with variations, knowing exactly how each adjustment will impact the final result. Prepare to transform your kitchen into a confectionery lab, where deliciousness is born from a blend of art and rigorous scientific understanding.
Sugar, Fat, and the Dance of Crystallization
The primary ingredient in fudge is sugar, and its behavior is paramount. When sugar is dissolved in a liquid and heated, it forms a supersaturated solution. The goal of fudge making is to control how these sugar molecules re-form into crystals as the mixture cools. Too many large crystals result in grainy fudge; too few or too small, and you get a gooey, unset mess. The addition of fat (butter) and milk solids (from evaporated milk or milk) plays a crucial role here.
Fats interfere with sugar crystal formation, keeping them small and dispersed, which contributes to fudge’s characteristic smooth texture. They also add richness and mouthfeel. Think of fats as tiny barriers, preventing sugar molecules from linking up too quickly and forming large, coarse crystals. This delicate balance is why precise measurements are so critical in fudge making. It’s a sweet ballet where every ingredient has a choreographed role, leading to that coveted velvety finish.
ADVERTISEMENT
Temperature: The Unsung Hero of Perfect Fudge
If sugar is the star, then temperature is the orchestrator of the entire fudge-making symphony. Achieving the correct cooking temperature is non-negotiable. For classic fudge, this typically falls within the “soft ball” stage (around 235-240°F or 113-116°C). Heating the mixture to this precise temperature ensures that enough water has evaporated, concentrating the sugar to the optimal level for crystallization.
However, the journey doesn’t end there. The cooling process is equally, if not more, critical. Once the fudge reaches its target temperature, it must be allowed to cool undisturbed to a specific lower temperature (typically around 110°F or 43°C) before it’s beaten. This slow, undisturbed cooling encourages the formation of a few large, stable sugar crystals. When you then begin to beat the fudge, these larger crystals act as “seeds,” encouraging the formation of countless tiny crystals around them, resulting in that incredibly smooth, non-grainy texture. Skipping or rushing this critical cooling phase is a common pitfall, leading to disappointing results. But why does Hershey’s cocoa, specifically, fit so perfectly into this intricate chemical dance?
Why Hershey’s Cocoa Excels: Flavor Profile and Consistency
Hershey’s Unsweetened Cocoa Powder is not just any cocoa; it’s a specific type of processed cocoa that greatly influences the final fudge. It’s a “natural” cocoa, meaning it hasn’t been heavily Dutch-processed (alkalized) to neutralize its acidity. This natural acidity reacts with baking soda (if used in other recipes) to create rise, but in fudge, it contributes a bright, distinctive chocolate flavor that is robust and slightly tangy, cutting through the sweetness of the sugar.
Its consistent quality and widely available nature make it a reliable ingredient for home bakers. The fine grind of Hershey’s cocoa also helps it disperse evenly throughout the sugar mixture, preventing lumps and contributing to the overall smoothness. This consistent performance and characteristic flavor make it the quintessential choice for the traditional American chocolate fudge recipe. Now that we understand the science, let’s translate that knowledge into actionable steps to craft your own masterpiece.
ADVERTISEMENT
Crafting Perfection: The Definitive Step-by-Step Hershey’s Cocoa Fudge Recipe
With a solid understanding of the science, you’re now poised to execute the perfect batch of Hershey’s Cocoa Fudge. This isn’t just a list of instructions; it’s a meticulously detailed guide, providing the ‘why’ behind each ‘what,’ ensuring that every step is performed with purpose and precision. Forget past failures; this is your blueprint for consistently creamy, divinely delicious fudge that will garner rave reviews.
We’ll walk through everything from ingredient selection to the crucial cooling and beating stages, uncovering the insider tips that make all the difference. Get ready to transform humble ingredients into a culinary triumph, step by precise step, and elevate your homemade fudge from good to absolutely legendary. Pay close attention, as even the smallest detail can dramatically impact your final, delectable result.
Gathering Your Arsenal: Essential Ingredients and Tools
Before you even think about lighting the stove, preparation is key. Having all your ingredients measured and tools at the ready prevents frantic searches and ensures a smooth, uninterrupted process. For a classic batch of Hershey’s Cocoa Fudge, you’ll need: granulated sugar, Hershey’s unsweetened cocoa powder, salt, milk (evaporated milk or whole milk work best), butter (real butter, not margarine, for superior flavor and texture), and vanilla extract. These seemingly simple components hold the power to create magic.
Beyond ingredients, the right tools are indispensable. A heavy-bottomed saucepan (at least 3-quart size) is crucial for even heat distribution and preventing scorching. A reliable candy thermometer is non-negotiable; guessing temperatures is the fastest route to grainy or unset fudge. A sturdy wooden spoon or heat-resistant spatula for stirring, and a buttered 8×8 or 9×9 inch pan for setting the fudge, complete your essential toolkit. Having everything mise en place sets the stage for success, but the real work begins with the careful art of boiling.
The Melting Pot: Mastering the Initial Boil
The journey to perfect fudge begins with combining the sugar, cocoa, salt, and milk in your heavy-bottomed saucepan. Stir these ingredients together thoroughly before applying heat to ensure the cocoa is fully incorporated and prevents lumps. Place the saucepan over medium heat, stirring constantly until the sugar dissolves completely and the mixture comes to a full boil. This initial stirring is vital to prevent sugar crystals from forming on the sides of the pan, which can seed undesirable crystallization later.
Once boiling, add the butter. Continue to boil the mixture, stirring only occasionally to prevent scorching on the bottom. Do NOT stir constantly during the boiling phase, as this can introduce air bubbles and encourage premature crystallization. Your candy thermometer should be clipped to the side of the pan, ensuring the tip is submerged in the mixture but not touching the bottom. Allow the fudge to cook steadily, without agitation, until it reaches the soft ball stage, typically between 235°F and 240°F (113-116°C). This precision is paramount, as a few degrees can make all the difference. But even after reaching the perfect temperature, the most critical phase is yet to come.
The Critical Cooling Phase: Patience is a Virtue
This is arguably the most overlooked and crucial step in fudge making. Once the fudge mixture reaches the desired temperature (235-240°F), immediately remove it from the heat. Without stirring, add the vanilla extract on top, but do not stir it in yet. Allow the hot mixture to cool completely and undisturbed in the saucepan to approximately 110°F (43°C). Do not rush this process by putting it in the fridge or stirring it. Patience is key here.
Why is this cooling phase so vital? As the fudge cools undisturbed, the sugar molecules are given the opportunity to align themselves slowly and systematically, forming a supersaturated solution that is primed for controlled crystallization. If you stir too early, you disrupt this delicate process, forcing crystals to form too rapidly and haphazardly, leading to a grainy texture. Waiting for the perfect cooling temperature ensures that when you *do* begin to beat, you’re initiating the formation of countless tiny, uniform crystals, which are the hallmark of creamy, smooth fudge. The anticipation builds, leading us to the final, transformative act.
Beating for Brilliance: Achieving the Creamy Texture
Once the fudge has cooled to precisely 110°F (43°C), it’s time for the transformative act of beating. This is where the magic truly happens, turning a sugary liquid into a solid, smooth confection. Using a sturdy wooden spoon or an electric mixer (with caution), begin to beat the fudge vigorously. At first, it will be glossy and fluid, but as you continue to beat, you’ll notice a remarkable change.
The mixture will gradually thicken, lose its glossy sheen, and become duller and more opaque. It will start to feel heavier and pull away from the sides of the pan. This is the moment when millions of tiny sugar crystals are forming, giving the fudge its characteristic creamy texture. Continue beating until the fudge is very thick and almost losing its stickiness, indicating it’s ready to be poured. This stage requires consistent effort and a keen eye, as over-beating can lead to dry, crumbly fudge, while under-beating results in a sticky, unset mess. Knowing when to stop is a learned skill, but recognizing these visual cues will guide you. Now, for the final flourish.
Setting the Stage: The Final Act of Fudge Creation
As soon as your fudge reaches that perfect thick, opaque, and less sticky consistency, immediately pour it into your prepared (buttered) 8×8 or 9×9 inch pan. Do not scrape the pan excessively; just get the bulk of the fudge into the pan. Using a buttered spatula or your hands, quickly press and spread the fudge evenly into the pan. Work swiftly, as the fudge will begin to set very rapidly once it’s removed from the stirring action and spread out.
Once spread, you can score the top lightly with a knife to mark out future squares, or simply allow it to set naturally. Place the pan in a cool, dry place – not the refrigerator, as rapid chilling can cause condensation and affect texture – for at least 2-4 hours, or until completely firm. Once fully set, use a sharp knife to cut the fudge into desired squares. The effort, precision, and patience invested in each step culminate in this moment: the perfect, melt-in-your-mouth Hershey’s Cocoa Fudge. But what happens when things don’t go exactly as planned? We’ll tackle the most common challenges next.
Decoding Common Conundrums: Troubleshooting Your Fudge Journey
Even with the most precise instructions, fudge can be notoriously finicky. It’s a culinary art form that requires both scientific precision and a dash of intuition. The good news is that most common fudge failures can be diagnosed and, more importantly, prevented or even rectified with a bit of knowledge and understanding. Don’t let a less-than-perfect batch deter you; instead, view it as a learning opportunity to refine your technique. This section will equip you with the insights needed to troubleshoot the most common fudge problems, turning potential disappointments into valuable lessons that lead to future triumphs. Get ready to banish grainy, crumbly, or oily fudge forever!
Understanding these troubleshooting tips isn’t just about fixing mistakes; it’s about deepening your mastery of the fudge-making process. Each problem often points back to a specific scientific principle discussed earlier, reinforcing your overall comprehension. With these solutions in your arsenal, you’ll be able to confidently tackle any fudge challenge that comes your way, ensuring your Hershey’s Cocoa Fudge always achieves its creamy, luscious potential. Let’s dive into the most frequently encountered dilemmas.
Grainy Fudge: The Crystal Catastrophe and Its Cure
The most common complaint among aspiring fudge makers is grainy fudge, a texture that feels more like solidified sugar than smooth chocolate. This happens when sugar crystals grow too large and unevenly. The primary culprits are usually one of two things: stirring the fudge too early or too much during the cooling phase, or not heating the initial mixture enough to fully dissolve all the sugar crystals.
To prevent this, ensure all sugar is dissolved before boiling begins, and most importantly, allow the fudge to cool undisturbed to the correct temperature (around 110°F or 43°C) before beginning to beat. If you find yourself with grainy fudge, don’t despair entirely. You can sometimes salvage it by returning it to the saucepan with a little added milk (a tablespoon or two), slowly melting it down over low heat, ensuring all crystals dissolve, then reheating it to the proper temperature and re-cooling and re-beating it correctly. It’s a second chance at sweet success, but let’s explore other common pitfalls.
Crumbly Fudge: When Your Sweet Treat Falls Apart
If your fudge turns out dry and crumbly, refusing to hold its shape, it’s typically a sign of one major issue: overcooking. Heating the fudge mixture too far beyond the soft ball stage (235-240°F) means too much moisture has evaporated. This results in a sugar concentration that’s too high, leading to a hard, brittle, and crumbly texture that struggles to set into a cohesive block. A reliable candy thermometer is your best friend here, as even a few degrees can make a significant difference.
Another, less common, cause could be over-beating the fudge once it’s cooled. Excessive beating can introduce too much air or further encourage crystal growth beyond the desired point, leading to a drier product. To fix crumbly fudge, try gently reheating it with a tiny amount of milk or butter (start with a tablespoon) until it just barely softens, then quickly spread it into the pan. This can sometimes re-introduce enough moisture to help it hold together, but prevention through precise temperature control is always the best strategy. What about the unsightly problem of oily fudge?
Oily Fudge: Separating the Good from the Gooey
An oily sheen or a separation of butterfat on the surface of your fudge can be unsightly and unappetizing. This usually occurs for a few reasons. One common cause is heating the fudge too quickly over high heat, which can cause the fat to separate from the sugar solution. Another reason might be insufficient beating; if the fudge isn’t beaten enough, the fat may not be properly emulsified back into the mixture, leading to visible oiliness.
Using butter with a lower fat content, or even substituting butter with margarine, can sometimes contribute to this issue, as pure butter offers the best emulsion stability. To prevent oily fudge, maintain a steady, medium heat during the boiling phase and ensure you beat the fudge thoroughly until it loses its glossy appearance and visibly thickens. While separating oil can be hard to completely fix once it happens, gently pressing a paper towel on the surface can absorb some excess oil, but the key truly lies in careful, controlled cooking and proper beating from the outset. What if your fudge just refuses to set?
Fudge That Won’t Set: The Sagging Sweetheart Solution
Perhaps one of the most frustrating fudge failures is a batch that simply won’t set, remaining a sticky, gooey, unmanageable mess. This problem almost always points to one issue: undercooking. If the fudge mixture doesn’t reach the correct temperature (235-240°F), it means there’s still too much moisture present. The sugar concentration isn’t high enough to allow for proper crystallization and setting. Without sufficient water evaporation, the sugar molecules can’t form the stable structure needed for firm fudge.
The solution here is straightforward, though it requires a bit more effort: return the unset fudge to your saucepan. Add a small amount of additional sugar (a tablespoon or two) to help increase the sugar concentration, and reheat the mixture slowly, stirring constantly, until it reaches the precise target temperature of 235-240°F on your candy thermometer. Then, allow it to cool undisturbed and beat it again as instructed. This second chance often yields a perfectly set batch. Finally, let’s address the opposite problem: fudge that’s too hard.
The Mystery of the Hard-as-Rock Fudge
When your beautiful batch of Hershey’s Cocoa Fudge turns out tough, chewy, or even brittle like rock candy, you’ve likely ventured too far in the cooking process. This is the flip side of undercooking: you’ve overcooked the mixture significantly past the soft ball stage, perhaps venturing into the firm ball or even crack stage. At these higher temperatures, an excessive amount of water evaporates, leading to an overly concentrated sugar solution that sets too hard. Your candy thermometer is critical for avoiding this.
Another less common cause could be insufficient fat or liquid in the initial recipe, but severe hardness almost always points to overcooking. Unfortunately, hard-as-rock fudge is the most challenging to salvage. While you can try to gently reheat it with a few tablespoons of milk or butter to reintroduce moisture and then re-beat, it rarely returns to its optimal creamy texture. The best approach is prevention: trust your thermometer, remove the fudge from the heat promptly, and avoid the temptation to “just cook it a little longer.” With these troubleshooting tips mastered, you’re not just a fudge maker; you’re a fudge alchemist, ready to elevate your creations even further.
Beyond the Basic Bar: Elevating Your Hershey’s Fudge Creations
Once you’ve mastered the foundational art of perfect Hershey’s Cocoa Fudge, a world of creative possibilities opens up. The classic recipe is undeniably delicious, but it also serves as an exceptional canvas for culinary experimentation. Imagine infusing new dimensions of flavor, adding intriguing textures, or transforming your fudge into personalized gifts. This section explores exciting ways to elevate your basic fudge, pushing the boundaries of what a simple cocoa treat can be.
From subtle enhancements to dramatic transformations, we’ll delve into techniques that will surprise and delight your palate, turning every batch into a unique masterpiece. Get ready to unleash your inner confectionery artist and discover how a few simple additions or twists can unlock an entirely new level of deliciousness. The journey from good to extraordinary starts here, with just a few creative sparks.
Flavor Fusion: Infusing New Dimensions
The beauty of Hershey’s Cocoa Fudge lies in its robust chocolate base, which pairs wonderfully with a myriad of complementary flavors. Don’t be afraid to experiment! For a subtle warmth, add a pinch of cinnamon or a tiny dash of cayenne pepper for a hint of Mexican chocolate heat during the cooking process. A splash of coffee extract or finely ground espresso powder can deepen the chocolate notes without tasting like coffee itself, creating a sophisticated mocha fudge.
Citrus zest, particularly orange or tangerine, grated finely and added at the beating stage, offers a bright, refreshing counterpoint to the richness. Mint extract creates a classic pairing, while a touch of almond extract can add a delightful nutty undertone. For an adult twist, a tablespoon or two of a liqueur like Kahlua, Irish cream, or even a good quality rum, added at the same time as the vanilla, can transform your fudge into an elegant, grown-up indulgence. Remember to start with small amounts and taste as you go, allowing the chocolate to remain the star while its supporting cast shines. But what about adding a little crunch?
Texture Transformations: Nuts, Marshmallows, and More
While the creamy smoothness of traditional fudge is a delight, introducing contrasting textures can elevate the experience to new heights. Once the fudge has been beaten and is ready to pour into the pan, fold in a variety of additions. Chopped nuts – walnuts, pecans, almonds, or even roasted pistachios – provide a satisfying crunch and nutty flavor. Toasted nuts will amplify their aroma and taste even further.
Miniature marshmallows stirred in at the very end will melt slightly, creating pockets of gooey sweetness that make for an irresistible rocky road fudge. Crushed peppermints or candy canes are perfect for a festive touch, especially around the holidays. Sprinkles, mini chocolate chips (white, milk, or dark), or even crushed pretzels for a salty-sweet crunch can also be folded in. The key is to add these textural elements quickly, just before pouring, to ensure they are evenly distributed without interfering with the setting process. But beyond personal enjoyment, fudge makes an incredible gift.
Gifting Gold: Packaging and Presentation Ideas
Homemade Hershey’s Cocoa Fudge isn’t just a treat; it’s a heartfelt gift that speaks volumes. Its rich flavor and beautiful appearance make it perfect for holidays, hostess gifts, or just a thoughtful gesture. The presentation is almost as important as the taste. Cut your fudge into uniform squares or charming shapes using cookie cutters for a professional look.
Layer the fudge squares with wax paper or parchment paper in an attractive tin or a simple clear cellophane bag tied with a pretty ribbon. Consider adding a small, handwritten tag with “Homemade with Love” or a festive message. For extra flair, tuck in a few sprigs of fresh rosemary or a small ornament. The care you put into presentation demonstrates the value you place on both the gift and the recipient, making your delicious creation even more special. What about tailoring your fudge to the seasons?
Seasonal Sensations: Adapting Fudge for Every Occasion
Fudge is incredibly versatile and can be adapted to suit any season or holiday. For autumn, consider adding pumpkin pie spice, a swirl of caramel, or chopped dried cranberries and pecans. Around Halloween, orange and black sprinkles or a crushed sandwich cookie layer can create a spooky delight. Christmas beckons with peppermint extract, crushed candy canes, or a swirl of green and red food coloring.
In spring, lemon zest or freeze-dried berry pieces can add a fresh, bright note, while in summer, a tropical twist with toasted coconut flakes and a hint of lime zest could be surprisingly refreshing. By simply adjusting your flavorings and add-ins, your Hershey’s Cocoa Fudge can seamlessly transition from a cozy winter treat to a vibrant summer delight, always keeping your recipes fresh and exciting for every occasion. But before we explore more practical applications, let’s briefly touch upon the unexpected benefits of this delightful chocolate treat.
The Hidden Health Benefits (and Indulgent Realities) of Chocolate
When we think of fudge, “health food” isn’t typically the first phrase that comes to mind. It’s an indulgent treat, a delicious escape. However, it’s worth noting that the primary ingredient – cocoa – does come with its own set of fascinating properties. While fudge should certainly be enjoyed in moderation, understanding the inherent qualities of its main component can add another layer of appreciation to every delicious bite. This isn’t an invitation to declare fudge a superfood, but rather a moment to appreciate the complex chemistry of chocolate itself.
We’ll explore some of the more surprising aspects of cocoa, from its antioxidant power to its potential mood-boosting effects. This brief detour into the world of nutritional science provides a fascinating backdrop to our culinary journey, allowing us to indulge with a slightly more informed perspective. After all, knowledge can enhance pleasure, even when it comes to something as simple and satisfying as a piece of homemade fudge. Prepare to be surprised by what lies beneath the surface of this sweet delight.
Cocoa’s Power: Antioxidants and Mood Boosters
Hershey’s Unsweetened Cocoa Powder, being essentially pure cocoa solids, is rich in flavonoids – a type of antioxidant also found in red wine and green tea. Antioxidants help protect the body’s cells from damage caused by free radicals. While the sugar and fat in fudge mitigate some of these benefits, the cocoa itself remains a potent source of these beneficial compounds.
Beyond antioxidants, cocoa contains compounds like phenylethylamine (PEA), which can stimulate the release of endorphins, leading to feelings of euphoria. It also contains tryptophan, a precursor to serotonin, a neurotransmitter known for its mood-regulating effects. While a piece of fudge won’t replace a balanced diet or medical advice, it’s a fascinating thought that a simple cocoa treat can offer these tiny bursts of well-being, making the indulgence feel just a little bit more justified. This leads us to the important concept of mindful enjoyment.
The Art of Mindful Indulgence: Savoring Every Bite
In a fast-paced world, it’s easy to mindlessly consume. But with a treat as rich and rewarding as Hershey’s Cocoa Fudge, the true pleasure comes from mindful indulgence. Instead of simply gobbling it down, take a moment to savor each bite. Notice the texture as it melts on your tongue, the complex layers of chocolate flavor, and the subtle notes of vanilla or any added infusions.
This practice of mindful eating not only enhances the sensory experience but also promotes a healthier relationship with food. It allows you to feel truly satisfied with a smaller portion, appreciating the quality over quantity. Fudge is an experience, a moment of pure, unadulterated pleasure. By embracing mindful indulgence, you transform a simple sweet into a luxurious ritual, making every square of your homemade Hershey’s Cocoa Fudge a truly unforgettable delight. Now, let’s explore the practicalities of enjoying your perfectly crafted fudge.
Maximizing Your Fudge Experience: Storage, Serving, and Savory Pairings
You’ve poured your heart, science, and a little bit of magic into creating the perfect batch of Hershey’s Cocoa Fudge. Now, how do you ensure its longevity and present it in ways that truly shine? This section moves beyond creation to consumption, offering essential tips on storing your fudge to maintain its freshness, creative ideas for serving it, and even some surprising, delicious pairings that will elevate the entire experience. Don’t let your culinary masterpiece go to waste or be enjoyed sub-optimally.
From airtight containers to unexpected flavor combinations, we’ll cover the details that transform a simple treat into a gourmet experience. Whether you’re planning a party, looking for a unique dessert idea, or simply want to keep your homemade stash fresh for as long as possible, these insights will be invaluable. Get ready to learn how to store, serve, and savor your Hershey’s Cocoa Fudge to its absolute fullest potential, ensuring every bite is as good as the first.
The Longevity Secret: Proper Storage Techniques
To preserve the creamy texture and rich flavor of your Hershey’s Cocoa Fudge, proper storage is paramount. Once the fudge is completely set and cut into squares, the enemy is air and moisture. The best way to store fudge is in an airtight container at room temperature. Layer the pieces with parchment or wax paper to prevent them from sticking together. Stored this way, fudge can remain fresh and delicious for up to 2-3 weeks.
Avoid storing fudge in the refrigerator for extended periods, as the cold can cause it to dry out and become crumbly, or even develop an undesirable condensation on the surface. If you need to store it longer, fudge freezes beautifully. Wrap individual pieces tightly in plastic wrap, then place them in an airtight freezer-safe container or freezer bag. Frozen fudge can last for several months. Thaw it at room temperature before serving for the best texture. Proper storage ensures that your hard work results in lasting enjoyment.
Creative Serving Suggestions for Every Occasion
While a simple square of fudge is delightful on its own, there are myriad ways to incorporate it into more elaborate desserts or serving presentations. Crumble fudge over a scoop of vanilla bean ice cream for an instant sundae, allowing the fudge to melt slightly into a warm, gooey sauce. Chop it into small pieces and fold into brownie batter or cookie dough for an extra burst of chocolatey goodness.
Melted fudge can be drizzled over cheesecakes, pancakes, or even fresh fruit platters. For a sophisticated dessert, serve small cubes of fudge alongside a cheese board, perhaps with some sharp cheddar or creamy brie for a surprising sweet-and-savory contrast. Or, for the ultimate indulgence, create tiny fudge truffles by rolling softened fudge in cocoa powder, chopped nuts, or sprinkles. The possibilities are truly endless, limited only by your imagination, but what about pairing it with other flavors?
Unexpected Pairings: What Goes Best with Fudge?
While the classic pairing for chocolate fudge might be a glass of cold milk, venturing beyond the obvious can lead to exciting taste discoveries. A robust cup of black coffee or a strong espresso is a phenomenal companion, as its bitterness beautifully cuts through the richness of the fudge, enhancing the chocolate notes. Similarly, a dry red wine, such as a Cabernet Sauvignon or Merlot, can provide an intriguing counterpoint, especially if your fudge has a subtle fruit or berry infusion.
For a truly indulgent experience, consider a fine port wine or a Scotch whisky; their complex notes of caramel, dried fruit, or smoke can create a symphony of flavors with the deep chocolate. Non-alcoholic options include a tart raspberry coulis drizzled over the fudge, or even a sprinkle of sea salt flakes to create a sophisticated sweet-and-salty balance. Don’t be afraid to experiment with these unexpected pairings; they just might reveal your new favorite way to enjoy Hershey’s Cocoa Fudge. Now, let’s look at the practical benefits of making your own.
The Economic Sweet Spot: Why Homemade Trumps Store-Bought
In a world increasingly driven by convenience, it’s easy to grab a pre-packaged box of fudge from the grocery store. However, the true value of homemade Hershey’s Cocoa Fudge extends far beyond mere taste. There’s a significant economic advantage to crafting your own confections, not to mention unparalleled quality control and the intangible benefits of creating something with your own hands. This section will delve into why opting for homemade fudge is a smart choice for your wallet, your palate, and your soul.
We’ll break down the cost-effectiveness, highlight the superior quality you achieve, and touch upon the deeper, more meaningful rewards that come from a homemade approach. Prepare to discover why your kitchen is the ultimate confectionery factory, capable of producing treats that outshine anything you can buy, at a fraction of the cost. The financial and personal dividends of making your own fudge are surprisingly significant, making it a truly sweet deal.
Cost-Effectiveness: Stretching Your Sweet Tooth Budget
When you compare the cost of ingredients for a batch of homemade Hershey’s Cocoa Fudge to the price of a comparable amount of high-quality, artisan fudge from a specialty store, the savings are often substantial. Basic ingredients like sugar, cocoa powder, milk, and butter are relatively inexpensive, especially when purchased in bulk or on sale. A single batch of homemade fudge yields a generous quantity, providing many servings for the price of just a few squares from a commercial vendor.
This cost-effectiveness makes homemade fudge an ideal option for entertaining, gifting, or simply satisfying your sweet cravings without breaking the bank. It also means you can experiment with different flavors and additions without the financial risk associated with buying multiple specialty fudge varieties. The initial investment in a candy thermometer pays for itself many times over, proving that deliciousness doesn’t have to come with an exorbitant price tag. But beyond cost, there’s the undeniable advantage of knowing exactly what goes into your treat.
Quality Control: Knowing Exactly What You’re Eating
One of the most compelling reasons to make your own Hershey’s Cocoa Fudge is the complete control you gain over the ingredients. Store-bought fudges often contain preservatives, artificial flavors, corn syrups, and other additives to extend shelf life or reduce production costs. When you make fudge at home, you choose fresh, high-quality ingredients – real butter, pure vanilla extract, and your trusted Hershey’s cocoa.
This allows you to avoid unnecessary chemicals and tailor the sweetness level to your preference. You know precisely what’s in every single square, offering peace of mind, especially for those with dietary sensitivities or who prefer a cleaner eating approach. This commitment to quality translates directly into superior taste and texture that mass-produced versions simply cannot replicate, ensuring a truly unadulterated chocolate experience. And finally, the most priceless benefit of all.
The Intangible Value: Crafting Memories
Beyond the economic savings and superior quality, perhaps the greatest value of making homemade Hershey’s Cocoa Fudge lies in the intangible. The act of cooking and baking for others, or even for oneself, is a profound expression of care and creativity. The aroma of chocolate filling your home, the methodical process of stirring and beating, and the anticipation of that perfect set fudge all contribute to a sensory experience that transcends mere consumption.
Homemade fudge becomes intertwined with memories: family gatherings, cozy evenings, shared laughter in the kitchen. It’s a connection to tradition, a way to slow down in a busy world, and a chance to engage in a rewarding creative outlet. This intangible value – the joy of creation, the warmth of sharing, and the memories forged – is truly priceless, making every batch of Hershey’s Cocoa Fudge not just a dessert, but a cherished moment. So, what’s next for your fudge journey?
Your Fudge Future: Embracing the Endless Possibilities
You’ve journeyed through the history, science, and intricate techniques of mastering Hershey’s Cocoa Fudge. You’ve learned to troubleshoot, to elevate, and to appreciate the myriad benefits of this classic confection. But the journey doesn’t end here; in fact, it’s just beginning. The world of fudge is vast and full of exciting possibilities, inviting you to continue experimenting, innovating, and sharing your sweet creations with the world. Your kitchen has now become a confectionery laboratory, ripe for endless delicious discoveries.
Embrace the spirit of continual learning and creative exploration. The skills you’ve honed in making perfect Hershey’s Cocoa Fudge are transferable to countless other culinary endeavors, but few offer the same immediate gratification and universal appeal. Get ready to embark on a sweet adventure that will not only tantalize your taste buds but also connect you to a wider community of fellow sweet enthusiasts, one delicious square at a time.
Continual Experimentation: Your Kitchen as a Confectionery Lab
Armed with the knowledge from this guide, your kitchen is no longer just a place to prepare meals; it’s a dynamic confectionery lab. Don’t be afraid to push the boundaries of the classic Hershey’s Cocoa Fudge recipe. What if you tried a different type of milk for a nuanced flavor? What about brown sugar for a chewier texture and a hint of caramel? Experiment with different extracts, spices, and a wider array of mix-ins like dried fruits, toasted coconut, or even a swirl of peanut butter.
Document your experiments, noting what works and what doesn’t. Learn from every batch, whether it’s perfect or less-than-ideal. Each variation is an opportunity to deepen your understanding of fudge chemistry and expand your personal repertoire. The beauty of baking is that failure is often just a stepping stone to a surprising new discovery. The more you experiment, the more intuitive the process will become, leading to truly unique and personalized fudge creations that reflect your evolving culinary style.
Sharing the Sweetness: Community and Connection
Fudge, at its heart, is a food of sharing. It’s a gift that brings smiles, a comforting treat that fosters connection. As you perfect your Hershey’s Cocoa Fudge, consider sharing your masterpieces with friends, family, and colleagues. Host a fudge-making party, swap recipes with fellow bakers, or simply offer a plate of your homemade delight as a thoughtful gesture. The act of sharing not only spreads joy but also opens up opportunities for feedback, new ideas, and deeper connections.
Your perfectly crafted Hershey’s Cocoa Fudge can be a conversation starter, a source of comfort, and a testament to the power of homemade goodness. It’s a legacy in every square, ready to be passed on, enjoyed, and celebrated. So, go forth, armed with knowledge, passion, and the finest Hershey’s cocoa, and continue your sweet journey. The next perfect batch is just a stir, a boil, and a beat away. What will you create next?