The Irresistible Allure of Coconut Bundt Cake: Your Ultimate Guide to Baking Perfection and Unforgettable Flavor
Unlocking a Dessert Dream: Why Coconut Bundt Cake Reigns Supreme
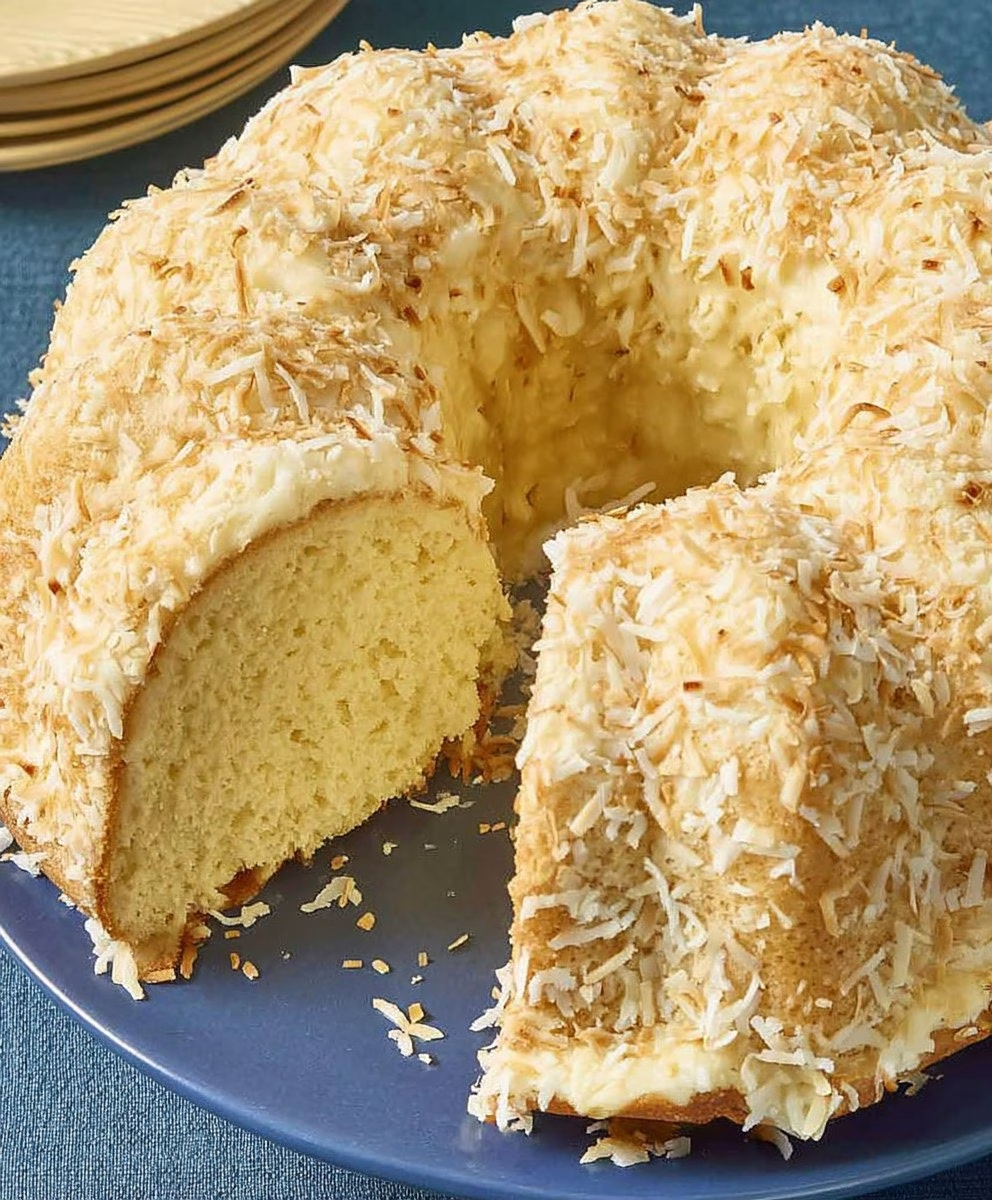
Imagine a dessert so enchanting, so profoundly satisfying, that it conjures sun-drenched beaches and sweet tropical breezes with every single bite. This isn’t just any cake; this is the Coconut Bundt Cake, a culinary masterpiece that effortlessly marries the nostalgic comfort of a classic Bundt with the exotic, creamy whisper of coconut. It’s a symphony of textures and flavors, from its impossibly moist crumb to the delicate, toasted flakes that often crown its majestic form.
ADVERTISEMENT
But what truly makes this cake a perennial favorite, a dessert that guests talk about long after the last crumb is gone? It’s more than just ingredients; it’s an experience. The Bundt pan, with its iconic fluted design, doesn’t just make for a pretty presentation; it ensures even baking and a superior crust-to-interior ratio. Combine this structural genius with the unparalleled richness of coconut, and you have a recipe for pure, unadulterated joy. Prepare to embark on a journey that will transform your baking skills and elevate your dessert repertoire.
This isn’t just about following a recipe; it’s about understanding the soul of this cake, unlocking its hidden secrets, and mastering techniques that will make yours stand head and shoulders above the rest. Are you ready to discover the magic? Because what we’re about to explore will change the way you bake forever.
The Tropical Heartbeat: What Makes Coconut So Captivating in Baking?
The Versatility of Coconut: From Flake to Milk
Coconut isn’t a one-trick pony; it’s a versatile ingredient that lends itself beautifully to countless culinary applications, especially in baking. In the realm of the Coconut Bundt Cake, we’re talking about a multi-faceted approach. Think of sweetened shredded coconut, which provides texture and a concentrated burst of sugary tropical flavor. Then there’s the creamy, luscious coconut milk, the secret weapon for an unbelievably moist crumb. And let’s not forget coconut extract, which amplifies that quintessential tropical aroma, tying all the flavors together.
ADVERTISEMENT
Each form of coconut contributes uniquely. Shredded coconut adds a delightful chewiness and visible appeal, making every slice a visual and textural delight. Coconut milk, often a star in vegan baking for its richness, offers an unparalleled depth of moisture that oils and regular milk simply can’t replicate in the same way. It’s this combination that builds layers of coconut essence, ensuring that from the first scent to the final swallow, there’s no mistaking the star of the show. But how do these elements interact to create such a moist and flavorful cake?
The secret lies in the fat content and natural sweetness of coconut. Unlike dairy, coconut fats are easily absorbed, leading to a tender crumb that resists drying out. This makes it an ideal ingredient for a Bundt cake, which often has a larger surface area exposed to heat. Understanding these nuances is the first step towards baking a cake that doesn’t just taste good, but feels like a soft cloud melting in your mouth. Ready to dive into the essential components?
The Essential Blueprint: Must-Have Ingredients for Your Bundt Masterpiece
Flour Power: Choosing the Right Foundation
Every magnificent cake starts with the right flour, and for a Coconut Bundt Cake, all-purpose flour is your trusty companion. It strikes the perfect balance between protein content for structure and tenderness. While cake flour might seem tempting for an even softer crumb, all-purpose provides the necessary stability for the Bundt’s iconic shape without making the cake too delicate to handle. Remember, precision in measuring flour is paramount – too much, and your cake can be dry and dense; too little, and it might struggle to hold its form.
The way you measure flour can drastically impact your outcome. The common “scoop and level” method can add up to 25% more flour than needed, leading to a heavy cake. For best results, spoon the flour into your measuring cup and then level it off with a straight edge. This seemingly minor detail can be the difference between a good cake and an extraordinary one. It’s one of those insider tips that seasoned bakers swear by, ensuring your Bundt has that desirable light-but-stable texture. But what about the other unsung heroes of the ingredient list?
ADVERTISEMENT
Beyond flour, ingredients like baking powder and baking soda play their roles diligently. Baking powder, usually double-acting, works twice: once when mixed with wet ingredients and again when heated in the oven, providing a consistent lift. Baking soda, on the other hand, needs an acidic component to activate, often found in ingredients like buttermilk or, in some coconut cake variations, even a hint of vinegar. Getting these leavening agents right is crucial for that characteristic fluffy rise. Now, let’s talk about the liquid gold that truly makes this cake sing.
The Golden Trio: Sugar, Eggs, and Butter – Your Flavor Foundation
No great cake exists without the foundational trio: sugar, eggs, and butter. Granulated sugar provides sweetness and helps tenderize the crumb, contributing to that desirable moist texture. It also aids in browning, giving your Bundt that appealing golden hue. When creaming butter and sugar, you’re not just mixing; you’re incorporating air, which is fundamental for a light and airy cake structure. This creaming process, often underestimated, is where the magic truly begins to happen, setting the stage for the cake’s ultimate texture.
Eggs, the unsung heroes, are multifaceted powerhouses. They provide structure, act as an emulsifier to bind ingredients, and contribute richness and moisture. Large eggs are typically standard in baking recipes because of their consistent size, which ensures proper balance in the recipe’s liquid-to-dry ratio. Always ensure your eggs are at room temperature before mixing; this allows them to emulsify more effectively with the butter and other ingredients, leading to a smoother batter and a more uniform texture in the final product. It’s a small step that yields significant rewards.
And then there’s butter. Unsalted butter is preferred, as it gives you control over the salt content in your recipe. Butter provides incredible flavor, richness, and contributes to the cake’s tenderness. Like eggs, having your butter at room temperature is crucial for proper creaming. If it’s too cold, it won’t cream properly; if it’s too warm, it might result in a greasy cake. Getting this right is a cornerstone of classic cake baking, but what about the star flavor that sets this cake apart?
ADVERTISEMENT
Coconut Core: Milk, Flakes, and Extract
Here’s where the coconut takes center stage. Full-fat canned coconut milk, not the beverage kind, is essential for maximum moisture and deep coconut flavor. Its rich texture and high-fat content are what give this Bundt cake its signature melt-in-your-mouth tenderness. Don’t be tempted to substitute with light coconut milk or dairy milk; the results will simply not be the same. This is where a significant portion of the tropical essence comes from, infusing every fiber of the cake.
Sweetened shredded coconut is your textural and visual component. It disperses throughout the batter, providing delightful chewy pockets and a concentrated burst of coconut sweetness. For an even more intense flavor, some recipes call for toasting a portion of the shredded coconut before incorporating it into the batter or using it as a garnish. This simple step unlocks a deeper, nuttier dimension to the coconut, transforming it from merely sweet to profoundly aromatic. It’s a game-changer you might not have considered.
Finally, coconut extract is the secret weapon for amplifying flavor. While coconut milk and shredded coconut provide natural flavor, a touch of extract enhances and rounds out the overall coconut profile, ensuring that every bite delivers an unmistakable tropical punch. It’s the culinary equivalent of turning up the volume on your favorite song, making sure the star ingredient truly shines. But before we get to mixing, let’s talk about the tools that make this dream a reality.
The Baker’s Arsenal: Essential Tools for Bundt Cake Success
The Star of the Show: Choosing Your Bundt Pan
The Bundt pan is not just a baking vessel; it’s an icon. Its distinctive fluted shape not only creates a stunning presentation but also provides more surface area for the cake to brown, resulting in a delightful crust. Standard Bundt pans are 10-cup capacity, which is perfect for most recipes. While there are countless designs available, a classic fluted pan is always a safe bet for its aesthetic appeal and reliable performance. But here’s where it gets interesting: the material of your pan can make a surprising difference.
ADVERTISEMENT
Heavy-gauge aluminum Bundt pans are generally preferred by seasoned bakers. They conduct heat evenly, ensuring uniform baking and preventing hot spots that can lead to unevenly cooked cake. Non-stick coatings are also incredibly helpful, but remember that even with non-stick, proper greasing and flouring are still absolutely essential to ensure your cake releases cleanly. A perfectly baked Bundt that sticks is every baker’s nightmare, so investing in a quality pan and treating it right is key. But what about getting that cake out of the pan without a hitch?
The preparation of the Bundt pan is just as critical as the ingredients themselves. This step, often rushed, is the make-or-break moment for a clean release. We’ll delve into the precise art of greasing and flouring, or even better, using a specialized baking spray, that guarantees your beautiful creation slides out effortlessly. Don’t skip this, because a flawless unmolding is the ultimate reward for your baking efforts. Next, let’s talk about the unsung heroes of your kitchen.
Beyond the Bundt: Mixers, Bowls, and spatulas
While the Bundt pan might be the star, a reliable mixer is the workhorse of your kitchen. A stand mixer is ideal for its power and ability to consistently cream butter and sugar, but a good hand mixer will also do the trick. The key is to ensure your butter and sugar are thoroughly combined and lightened, incorporating enough air for a tender crumb. This aeration process is vital; it’s not just about mixing ingredients, it’s about building the cake’s internal structure from the ground up.
A sturdy set of mixing bowls in various sizes is also indispensable. Glass or stainless steel bowls are excellent choices as they are non-reactive and easy to clean. Silicon spatulas are your best friends for scraping down the sides of the bowl, ensuring all ingredients are fully incorporated, and for gently folding in dry ingredients without overmixing. Overmixing is a common pitfall that can lead to a tough cake, so gentle handling, especially in the final stages, is paramount. But what about the often-overlooked necessity?
An accurate kitchen scale, though not strictly required for every recipe, is an invaluable tool for consistent baking. Measuring by weight (grams) rather than volume (cups) eliminates inconsistencies caused by differences in measuring techniques or flour compaction. This level of precision can elevate your baking from good to consistently great, making every batch of your Coconut Bundt Cake as perfect as the last. It’s an investment that pays dividends in reliability and reduced baking anxiety. Now, for the moment you’ve been waiting for: the actual baking process!
The Art of Assembly: Step-by-Step Baking Perfection
Prepping for Success: The Golden Rule of Bundt Pans
Before you even think about mixing batter, the Bundt pan demands your full attention. This is arguably the most crucial step for a clean release. First, ensure your pan is perfectly clean and dry. Then, liberally grease every nook and cranny with solid vegetable shortening or a high-quality baking spray designed for intricate pans (one that contains flour). Don’t use butter, as its lower melting point can cause sticking. Once greased, dust the pan thoroughly with flour, tapping out any excess. For a coconut cake, you can even use finely shredded coconut instead of flour for an extra layer of flavor and texture on the crust!
The goal here is to create a non-stick barrier that allows the cake to release cleanly. Take your time, ensuring every groove and crevice is coated. This meticulous preparation prevents those heartbreaking moments when your beautifully baked cake refuses to budge. It’s a small investment of time that pays off immensely, guaranteeing your cake emerges flawless and ready for its grand reveal. Now that your stage is set, let’s get into the mix.
Another insider tip: once your pan is greased and floured, place it in the refrigerator while you prepare the batter. This helps the grease and flour adhere better and chill, providing an even more robust non-stick surface once the warm batter is added. It’s a simple trick that adds an extra layer of security, especially with ornate Bundt designs. Ready to bring the ingredients together?
The Mixing Method: Crafting the Perfect Batter
Most Bundt cakes, including our Coconut Bundt, benefit from the creaming method. Begin by creaming room-temperature butter and sugar together until light, fluffy, and pale. This process incorporates air, which is essential for a tender crumb. Next, beat in the room-temperature eggs one at a time, ensuring each is fully incorporated before adding the next. This creates a stable emulsion, preventing your batter from curdling. The goal is a homogeneous mixture that hums with potential.
In a separate bowl, whisk together your dry ingredients: flour, baking powder, baking soda, and salt. This ensures even distribution of the leavening agents. Now, begin adding the dry ingredients to the wet mixture alternately with your liquid ingredients (like coconut milk), starting and ending with the dry. This common technique, known as the “alternating method,” helps create a strong structure and minimizes gluten development, keeping your cake tender. Mix only until just combined to avoid overworking the gluten, which leads to a tough cake.
Finally, gently fold in your shredded coconut. Use a spatula to ensure even distribution without deflating all that precious air you’ve incorporated. This is where patience is key; avoid aggressive mixing. The batter should be smooth, thick, and inviting, a promise of the deliciousness to come. But once your batter is perfect, how do you ensure a uniform bake in that intricate pan?
The Bake: Oven Mastery for Bundt Perfection
Once your batter is mixed, spoon it evenly into your prepared Bundt pan. Don’t just dump it in; carefully spoon it around the ring, ensuring an even distribution. This helps prevent tilting during baking and promotes a uniform rise. Gently tap the pan on your counter a few times to release any large air bubbles. This small step can prevent unsightly holes in your final cake and ensure a denser, more consistent crumb.
Preheat your oven to the specified temperature well in advance. Consistency is everything when it comes to oven temperature. Placing your Bundt pan on a baking sheet before putting it in the oven can catch any potential overflow and makes it easier to handle. Bake until a wooden skewer or toothpick inserted into the thickest part of the cake comes out clean. This is the ultimate test for doneness, indicating that the cake is fully cooked through without being overbaked and dry. But the journey isn’t over once it comes out of the oven.
The cooling process is just as crucial as the baking. Resist the urge to flip your cake out immediately. Let it cool in the pan on a wire rack for at least 10-15 minutes. This allows the cake to set and firm up, making it less likely to break when unmolded. After this initial cooling, carefully invert the pan onto the wire rack and lift the pan away. If you’ve prepped your pan correctly, it should slide out beautifully. The anticipation of that perfect release is truly part of the baking thrill. What’s next for your tropical masterpiece?
The Crowning Glory: Glazes, Frostings, and Garnishes
The Simple Elegance of a Coconut Glaze
For many, the beauty of a Bundt cake lies in its simplicity, and a delicate glaze is often all it needs. A basic coconut glaze is incredibly easy to make and adds another layer of subtle coconut flavor and appealing sheen. Combine sifted powdered sugar with a few tablespoons of coconut milk and a touch of coconut extract. Whisk until smooth and pourable. The consistency is key here: too thick, and it won’t drizzle gracefully; too thin, and it will disappear into the cake without leaving a visible coat.
Drizzle the glaze over the cooled or slightly warm cake. If the cake is too hot, the glaze will melt and soak in completely, leaving no visible coating. If it’s too cold, the glaze might set too quickly and not adhere properly. A slightly warm cake allows for a perfect absorption and setting. The elegance of a simple glaze perfectly complements the Bundt’s intricate design, highlighting its curves without overpowering the main flavor. But what if you want something a bit more decadent?
You can adjust the thickness of your glaze by adding more powdered sugar for a thicker coating, or more coconut milk for a thinner, almost translucent sheen. For an extra pop of flavor, you can even incorporate a tiny pinch of lime zest into your glaze, which beautifully complements the coconut. It’s these small adjustments that allow you to customize your cake to perfection. But for those who crave ultimate indulgence, there’s another option.
Decadent Coconut Cream Cheese Frosting
If you’re aiming for sheer indulgence, a rich coconut cream cheese frosting is the answer. This combines the tangy creaminess of classic cream cheese frosting with an infusion of coconut flavor. Beat softened cream cheese and butter together until smooth, then gradually add sifted powdered sugar. Finally, beat in a generous amount of full-fat coconut milk (often chilled and scooped from the solid part of the can for extra thickness) and a touch of coconut extract. This creates a frosting that is both luxurious and intensely flavorful.
This frosting can be piped onto the cake for a more elaborate look or simply spread generously over the top and down the fluted sides. The contrast between the tangy cream cheese and the sweet coconut is absolutely divine, elevating the cake to dessert nirvana. While a glaze offers visual appeal, a frosting adds a textural layer of lusciousness that can truly transform the eating experience. But no cake is complete without its finishing touches.
For an even more pronounced coconut flavor and texture, toast some shredded coconut in a dry skillet over medium-low heat until golden brown and fragrant. This toasted coconut can then be sprinkled generously over your glazed or frosted cake, adding a beautiful crunch and a nutty depth of flavor that is simply irresistible. It’s a simple step that adds a professional flourish and an explosion of taste. Now that your cake is beautiful, how do you serve it?
Beyond the Bake: Serving, Storing, and Enjoying
The Perfect Slice: Serving Suggestions
A Coconut Bundt Cake, with its grand presence, often stands alone as a magnificent centerpiece. However, pairing it with complementary elements can elevate the experience even further. A light dusting of powdered sugar adds a touch of whimsical elegance and a subtle extra sweetness. For a burst of freshness, a scattering of fresh berries – raspberries, blueberries, or sliced strawberries – provides a vibrant contrast to the rich coconut flavor. The slight tartness of the fruit beautifully cuts through the sweetness of the cake.
For a truly indulgent treat, consider a dollop of freshly whipped cream or a scoop of vanilla bean ice cream alongside each slice. The coolness and creaminess provide a delightful textural contrast. A light drizzle of warm caramel sauce or a tropical fruit coulis (passion fruit or mango) can also add another layer of complexity and visual appeal. The beauty of the Bundt cake is its versatility, allowing it to be dressed up or down depending on the occasion. But how do you ensure its deliciousness lasts?
Think about the occasion: for a casual brunch, a simple dusting of sugar might suffice. For a festive gathering, the full complement of frosting, toasted coconut, and fresh fruit creates a showstopper. The visual presentation is almost as important as the taste, inviting guests to partake. Don’t forget a sharp, serrated knife for clean slices that maintain the cake’s structural integrity. Now, let’s talk about keeping it fresh.
Preserving Perfection: Storage Tips
To keep your Coconut Bundt Cake at its best, proper storage is crucial. If unglazed, store the cake at room temperature, tightly wrapped in plastic wrap or in an airtight cake dome, for up to 3-4 days. This prevents it from drying out and keeps it wonderfully moist. If your cake is glazed or frosted with a cream cheese frosting, it will need to be refrigerated due to the dairy content. In this case, wrap it loosely or cover it with a cake dome to prevent the frosting from smudging, and consume within 5-7 days. Always bring refrigerated cake back to room temperature before serving for the best flavor and texture.
Freezing is also an excellent option for longer storage. Unglazed or unfrosted cake can be wrapped tightly in several layers of plastic wrap, then a layer of aluminum foil, and frozen for up to 2-3 months. Thaw overnight in the refrigerator, then bring to room temperature before glazing or serving. This allows you to bake ahead for special occasions, saving time and stress, and ensuring you always have a delicious treat on hand for unexpected guests. Imagine the convenience!
One pro tip for keeping unfrosted cake moist during storage: place a slice of bread on top of the cut side before wrapping. The bread will dry out, but it will sacrifice its moisture to the cake, keeping your cake tender. It’s a simple trick, but one that makes a world of difference for leftovers. Now, what if things don’t go perfectly in the kitchen?
Troubleshooting Your Bundt: Common Pitfalls and Solutions
The Sunken Center: Why Did My Cake Collapse?
Few things are more disheartening than pulling a beautiful Bundt cake from the oven only to watch its center deflate. The sunken center is a common baker’s woe, but it’s usually preventable. The most frequent culprits are opening the oven door too early (before the cake is set), underbaking (not allowing the cake to fully cook through), or too much leavening. An oven temperature that’s too high can also cause the outside to set too quickly while the inside remains raw, leading to collapse.
To avoid this, resist the urge to peek at your cake until at least two-thirds of the way through the baking time. Ensure your oven temperature is accurate (an oven thermometer is a worthy investment!). Always test for doneness with a skewer in the thickest part of the cake – if it comes out with wet batter, it needs more time. And double-check your leavening agent measurements; too much can cause an initial rapid rise followed by a spectacular fall. It’s all about patience and precision. But what about the opposite problem?
Sometimes, the issue isn’t a total collapse, but rather a slight dip or a dense, gummy texture in the middle. This often points to insufficient mixing in the initial creaming stages, which means not enough air was incorporated, or too much liquid in the batter. Remember the importance of room-temperature ingredients to facilitate proper emulsification and aeration. Understanding these nuances helps you become a more intuitive baker. Now, what about a dry cake?
The Dry Dilemma: Ensuring a Moist Crumb Every Time
A dry cake is the ultimate disappointment. The secret to a consistently moist Coconut Bundt Cake lies in a few key areas. Overbaking is the primary culprit: every minute past done pulls vital moisture from your cake. Watch your cake closely towards the end of the baking time, and rely on the skewer test rather than simply following the recipe’s timing rigidly. Ovens vary wildly, and your cake might be done sooner or later than expected.
Another factor is the balance of ingredients. Too much flour or too little fat can result in a dry cake. Ensure you’re measuring your flour correctly (spoon and level!), and don’t skimp on the butter or full-fat coconut milk. These fats are crucial for moisture and tenderness. Also, proper mixing techniques play a role; overmixing develops gluten, which can lead to a tougher, drier texture. Aim for just combined when adding dry ingredients to avoid this pitfall. It’s a delicate dance, but one that leads to perfection.
Temperature of ingredients also matters. Room temperature eggs and butter emulsify better, creating a smoother, more stable batter that retains moisture during baking. If your ingredients are too cold, your batter might be lumpy and less homogenous, leading to an uneven crumb that dries out faster. Master these points, and dry cake will become a distant memory. But what if your cake just won’t release from the pan?
The Sticking Point: When Your Bundt Refuses to Release
The Bundt pan sticking is perhaps the most frustrating issue. You’ve put in all that effort, and your beautiful creation is now in pieces. The problem almost always lies in inadequate pan preparation. Simply greasing the pan isn’t enough; you must thoroughly grease every crevice and then properly flour it. Some bakers swear by using a specific baking spray that contains flour, while others mix their own concoction of shortening and flour paste.
Don’t be shy with the grease and flour! Ensure every ridge and cranny is coated. After greasing, dusting with flour, and tapping out the excess, a final step is to chill the prepared pan in the refrigerator while you make the batter. This helps the coating adhere more firmly. When it comes time to unmold, let the cake cool in the pan on a wire rack for the recommended 10-15 minutes, no more, no less. This allows the cake to firm up slightly while still being warm enough to release easily. Trying to unmold too early or too late can lead to disaster.
If your cake still sticks, don’t panic immediately. Sometimes, gently tapping the sides and bottom of the pan can help. If it’s truly stuck, place the pan on a warm, damp towel for 5-10 minutes, which can help loosen the edges. Worst case scenario, you can always turn a broken Bundt into a delicious trifle or cake pops! But with proper preparation, you’ll rarely face this heartbreaking scenario. Now, let’s explore some creative twists.
Creative Variations: Elevating Your Coconut Bundt Cake
Zesty Twists: Citrus and Spice Additions
While the classic Coconut Bundt Cake is undeniably delicious, sometimes a little twist can elevate it to new heights. Citrus, in particular, pairs beautifully with coconut. Consider adding the zest of a lime, lemon, or even an orange to your batter. The bright, acidic notes of citrus cut through the richness of the coconut, creating a vibrant and refreshing flavor profile. This addition can transform the cake from comforting to exhilarating, adding a surprising burst of freshness that delights the palate.
For a subtle warmth and complexity, a pinch of ground ginger or cardamom can be a delightful addition. These spices complement the coconut beautifully without overpowering it, adding a layer of sophisticated flavor that will intrigue your guests. Imagine a hint of ginger elevating that tropical sweetness, or the aromatic perfume of cardamom weaving through each bite. These simple additions can turn a familiar favorite into something truly unique and memorable, reflecting your personal culinary flair.
Another intriguing option is a touch of rum extract or even a splash of real dark rum. Coconut and rum are a classic pairing, evoking tropical cocktails and laid-back island vibes. This can be added to the batter or even brushed onto the warm cake after baking for an extra boozy kick. Experiment with these elements to discover your signature Coconut Bundt Cake. But what about adding other textures?
Nutty & Fruity: Adding Texture and Depth
Beyond citrus and spice, incorporating other textures can add fascinating dimensions to your Coconut Bundt Cake. Chopped macadamia nuts or pecans add a delightful crunch and a buttery, nutty flavor that complements the coconut perfectly. Toasting the nuts lightly before adding them to the batter enhances their flavor even further, releasing their aromatic oils and creating a deeper, more satisfying taste. Imagine the surprise of finding a perfectly toasted nut amidst the moist cake.
For a fruity explosion, consider adding finely diced pineapple, mango, or even mashed banana to the batter. These fruits not only add sweetness and moisture but also introduce new tropical flavor notes that harmonize beautifully with the coconut. If using fresh fruit, ensure it’s well-drained to avoid excess moisture, which could affect the cake’s texture. Candied pineapple or dried mango can also be used for a more concentrated burst of flavor and chewiness.
Chocolate, believe it or not, can also be a fantastic partner to coconut. Mini chocolate chips or finely chopped white chocolate can be folded into the batter for an unexpected layer of sweetness and richness. White chocolate, in particular, melts beautifully and adds a creamy texture that pairs wonderfully with the coconut. These additions are about personalizing your cake, turning it into a canvas for your culinary creativity. What about making it even more decadent?
Double Down: Coconut Overload Variations
If you’re a true coconut aficionado, why stop at just a few forms? Explore “coconut overload” variations that amplify the tropical essence. Consider using coconut oil in place of some or all of the butter for an even purer coconut flavor and a slightly lighter texture. Coconut oil, particularly virgin coconut oil, imparts a distinct aroma and contributes to a very moist crumb, especially when at room temperature.
Another idea is to infuse your milk with even more coconut. You could gently heat a small amount of coconut milk with extra shredded coconut, let it steep, then strain it before adding to the batter for an intensified liquid base. This process extracts maximum flavor, creating a subtle yet profound difference in the final cake. For the ultimate coconut experience, make a coconut cream filling to pipe into the center of your Bundt after baking, or between layers if you choose to slice it horizontally.
And for the exterior, go beyond just toasted flakes. A rich coconut ganache made with white chocolate and coconut cream, drizzled over the top, can be utterly divine. Or, create a thick coconut streusel topping to sprinkle over the batter before baking, adding a crumbly, textured crust that’s bursting with coconut flavor. These are the secrets to truly making your Coconut Bundt Cake unforgettable, ensuring every single bite screams “coconut!” What’s the hidden history behind this cake?
The Sweet History: Bundt Cake Lore and Coconut Journeys
From Germany to America: The Bundt’s Unexpected Rise
The Bundt cake, with its distinctive fluted shape, seems like an all-American classic, but its origins are rooted deeply in European baking tradition. The Bundt pan’s design is inspired by the traditional German *Gugelhupf* mold, a fluted cake baked for centuries in Central Europe. These cakes were often enriched with dried fruits and nuts, symbolizing abundance and celebration. The journey from European kitchens to American homes is a fascinating tale of immigration and innovation.
In the 1950s, a group of Jewish women in Minnesota, members of the Hadassah Society, sought to recreate the familiar *Gugelhupf* from their heritage. They approached Dave Dalquist of Nordic Ware, a cookware company, with the idea of manufacturing a modern, lightweight version of the traditional cast-iron mold. He developed the aluminum Bundt pan, which initially struggled to gain popularity. But here’s where it gets interesting: its fate changed dramatically in 1966.
The Bundt pan’s big break came when the “Tunnel of Fudge” cake, baked in a Nordic Ware Bundt pan, won second place in the Pillsbury Bake-Off contest. Suddenly, everyone wanted a Bundt pan! Sales skyrocketed, transforming Nordic Ware into a household name and the Bundt pan into an American baking staple. This unexpected turn of events solidified the Bundt’s place in culinary history, proving that sometimes, the simplest things can become national sensations. But how did coconut become such a popular baking ingredient?
The Global Journey of the Coconut
Coconut itself has a rich and ancient history, traversing continents and shaping cuisines across the globe. Originating in Southeast Asia and the Pacific Islands, coconuts spread naturally through ocean currents, carried by their buoyant husks to distant shores. They quickly became a staple in tropical regions, not just for their culinary uses but for their versatile applications in textiles, fuel, and building materials. This remarkable adaptability made it a cornerstone of tropical diets.
The arrival of coconuts in Europe and the Americas, primarily through trade routes, brought this exotic flavor to new palates. Initially a luxury, coconut gradually became more accessible, especially in its dried and shredded forms. Its unique taste and texture quickly found a place in Western desserts, adding an exotic twist to familiar cakes, pies, and cookies. The pairing of coconut with rich, comforting cakes like the Bundt was a natural evolution, blending global flavors with local traditions. It’s a testament to how food truly connects cultures.
From the early trade ships carrying dried coconut to today’s global supply chain of coconut milk and oil, the journey of this remarkable fruit mirrors the evolution of interconnectedness in our world. Its continued popularity is a testament to its irresistible flavor and adaptability in a myriad of culinary creations. So, every slice of your Coconut Bundt Cake tells a story, a delicious blend of history and innovation. Now, how do you make this cake truly your own?
Personalizing Your Perfect Bundt: Tips for Customization
Adapting for Dietary Needs: Gluten-Free & Dairy-Free Options
The beauty of modern baking is the ability to adapt recipes to suit various dietary needs without sacrificing flavor or texture. For a gluten-free Coconut Bundt Cake, simply substitute the all-purpose flour with a high-quality gluten-free all-purpose baking blend. Look for blends that contain xanthan gum, as this helps provide structure that gluten typically offers. You might find a slightly different texture, but with proper ratios, the cake can be just as moist and delicious. It opens up this delightful dessert to a wider audience, ensuring no one misses out.
For a dairy-free version, the transition is remarkably easy since the recipe already calls for coconut milk. Simply replace the butter with a good quality dairy-free butter alternative or coconut oil. Ensure your chosen substitute has a similar fat content and behaves similarly to butter when creamed. For the cream cheese frosting, opt for dairy-free cream cheese and dairy-free butter, combined with powdered sugar and coconut milk. The rich flavor of coconut makes it a natural fit for these adaptations.
Remember that when making substitutions, small adjustments to liquid content might be necessary. Gluten-free flours can absorb liquids differently, so observe your batter consistency and adjust with a tablespoon of extra coconut milk if it seems too thick. These adaptations are not compromises; they are opportunities to create an inclusive and equally delicious experience for everyone at your table. But what about making it even healthier?
Subtle Sweeteners & Healthier Twists (Without Compromise)
While a Bundt cake is undeniably a treat, you can subtly adjust the sweetness and nutritional profile without sacrificing the celebratory nature. Consider reducing the overall sugar by 10-20% if you prefer a less sweet cake; often, the natural sweetness of coconut and any glazes is sufficient. You can also experiment with alternative sweeteners like maple syrup or a portion of applesauce, though these may require adjustments to the liquid content and baking time. The goal is to retain flavor while catering to preferences.
Incorporating whole wheat pastry flour for a portion of the all-purpose flour (say, up to 25%) can add fiber and a nuttier flavor profile without making the cake too dense. This subtle change can elevate the nutritional value without making it taste “healthy.” Another clever trick is to add finely grated zucchini or carrots (squeezed dry!) to the batter. These vegetables add incredible moisture and nutrients without being detectable in the final flavor, often making the cake even more tender.
For added healthy fats, consider using unsweetened shredded coconut and relying more on the natural sweetness of the other ingredients or glazes. These small, thoughtful tweaks allow you to enjoy your Coconut Bundt Cake with a little less guilt, while still indulging in a truly satisfying dessert experience. It’s all about balance and finding what works best for your lifestyle. And finally, how do you take your baking to the next level?
Beyond the Recipe: Becoming a Bundt Cake Master
The Science of Baking: Understanding Ingredients and Reactions
To truly master the Coconut Bundt Cake, it helps to understand the “why” behind the “how.” Baking is a science, and knowing the role of each ingredient allows for more intuitive adjustments and troubleshooting. For instance, understand that flour provides structure, fat (butter, coconut milk) provides tenderness and moisture, sugar tenderizes and aids browning, and leavening agents (baking powder, baking soda) create rise. These fundamental relationships are your secret weapon.
Consider the Maillard reaction, the chemical process responsible for the delicious browning on your cake’s crust. It’s not just about color; it’s about flavor development, creating those complex, caramelized notes that make the exterior so appealing. Knowing this helps you understand why even baking temperatures and proper pan greasing are critical for that perfect golden hue. This deeper knowledge transforms you from a recipe follower into a true artisan, capable of adapting and innovating.
Understanding the interaction between acids and bases (like buttermilk and baking soda) or the role of protein development from flour (which is why overmixing leads to toughness) empowers you to diagnose and fix problems on the fly. This scientific foundation builds confidence and leads to consistent success. It’s a journey of discovery that continually rewards curious bakers. So, what’s one more secret weapon?
The Power of Patience: Resting and Cooling
In our fast-paced world, patience is often overlooked in the kitchen, but it’s a baker’s greatest ally. Resist the urge to rush the steps. Allow butter and eggs to come to room temperature fully. Take your time creaming butter and sugar until truly light and fluffy. Don’t rush the alternating additions of wet and dry ingredients, and mix only until just combined.
Crucially, allow your cake to cool in the pan for the recommended time before inverting it. This crucial resting period allows the cake’s structure to set, preventing it from crumbling or sticking. And once it’s out of the pan, allow it to cool completely on a wire rack before glazing or frosting. Applying glaze or frosting to a warm cake can lead to a messy, melted disaster. Patience here ensures a beautiful, professional finish and a cake that holds its shape.
Baking is an act of love, and rushing it often compromises the final product. Embrace the process, savor each step, and trust that the time invested will yield superior results. A perfectly cooled cake accepts glazes beautifully, slices cleanly, and delivers the full sensory experience it was designed for. It’s a testament to the fact that some things are worth waiting for, especially when they taste this good. Now, for the final flourish of inspiration!
The Enduring Legacy of Your Coconut Bundt Cake
As you slice into your perfectly baked Coconut Bundt Cake, admire its golden crust, its tender, moist interior, and the subtle dance of shredded coconut throughout. This isn’t just a dessert; it’s a testament to thoughtful baking, a fusion of tropical delight and comforting tradition. You’ve mastered the essential ingredients, navigated the nuances of the Bundt pan, and understood the critical steps that ensure a triumphant bake every single time.
This cake is more than just a recipe followed; it’s a story you’ve created, a moment of joy you’re about to share. From its unexpected German origins to the global journey of its star ingredient, the Coconut Bundt Cake carries a rich history within its fluted form. By personalizing it with zesty twists, nutty additions, or even adapting it for dietary needs, you’ve made it uniquely yours, a reflection of your culinary creativity and care.
As guests take their first bite, watch their eyes light up with delight, transported to a sun-kissed paradise with every mouthful. This cake isn’t just delicious; it’s an experience, a memory in the making. And now that you’ve unlocked its secrets, imagine the endless possibilities, the variations yet to explore, the sheer pleasure of creating something truly extraordinary. What tropical dream will you bake next, powered by the confidence of your Bundt cake mastery?
The journey of baking perfection never truly ends; it merely evolves with each new challenge and every delicious success. So, keep exploring, keep experimenting, and keep sharing the joy that only a perfectly baked, profoundly flavorful Coconut Bundt Cake can bring. Your baking adventure has only just begun.