ADVERTISEMENT
Unlock the Secret to Fall-Off-The-Bone Perfection: The Ultimate Crockpot BBQ Ribs Masterclass You Can’t Afford to Miss!
The Unspoken Truth About Ribs: Why Most People Get It Wrong (And How You Won’t)
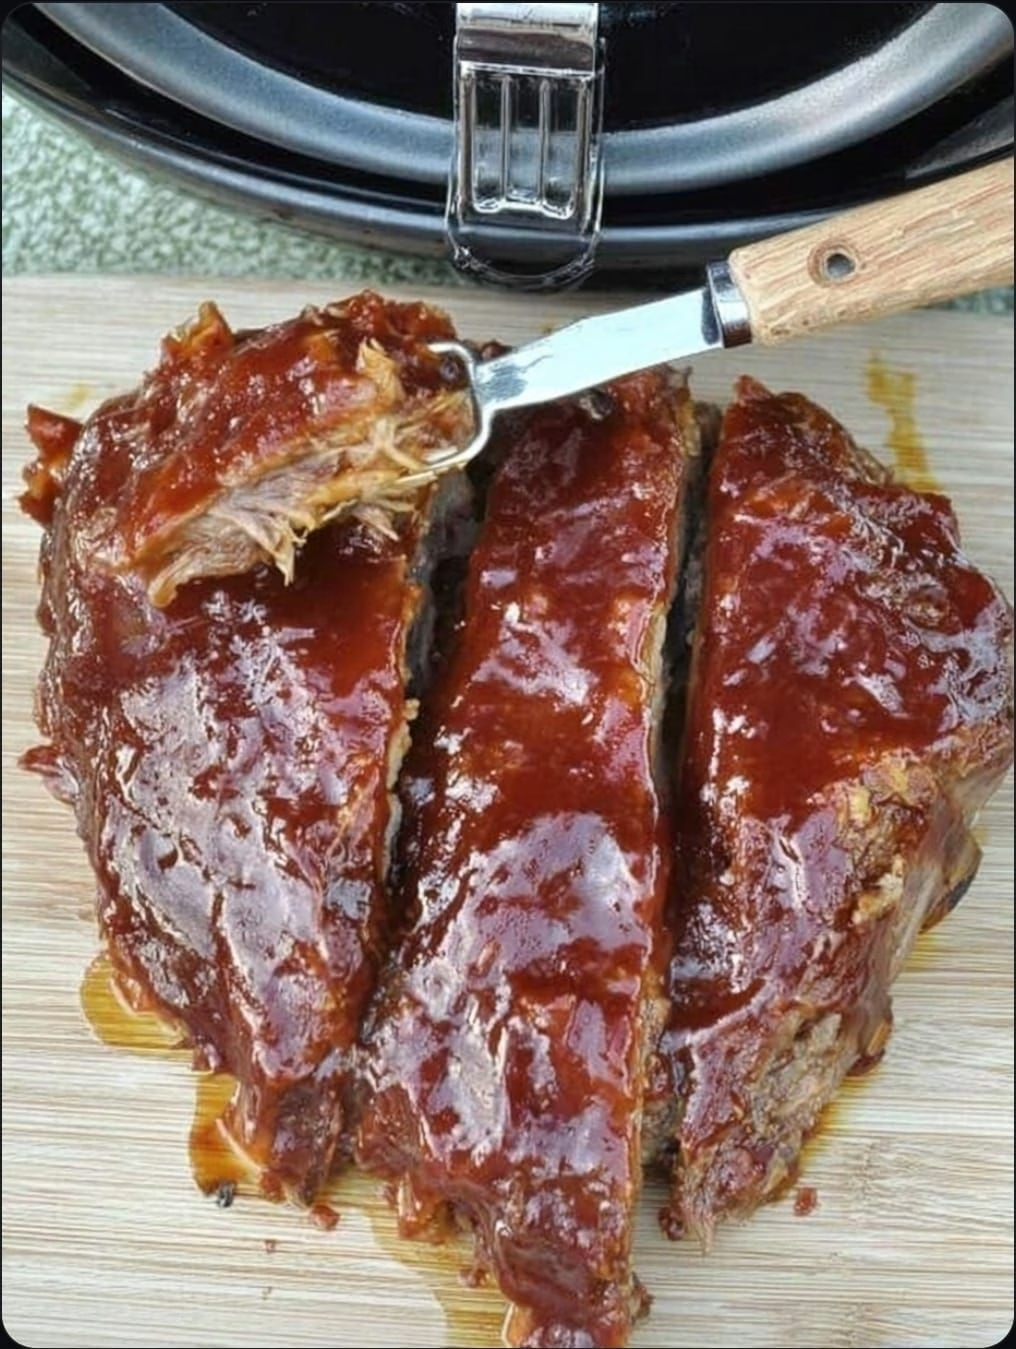
Imagine this: a plate piled high with glistening, perfectly caramelized ribs. You pick one up, and without any effort, the meat literally melts away from the bone, tender and succulent, infused with a smoky, sweet, tangy barbecue flavor that dances on your tongue. This isn’t just a dream; it’s the promise of truly phenomenal barbecue ribs. Yet, for so many, this vision remains stubbornly out of reach, replaced by dry, chewy, stubbornly attached meat that requires a knife and fork, and far too much effort.
The culinary world is littered with well-meaning attempts at homemade ribs that fall short. People boil them, bake them, grill them, only to be met with disappointment. They’re either tough as leather, bland as cardboard, or simply don’t have that iconic “fall-off-the-bone” texture that defines true rib perfection. The secret, it turns out, isn’t in a high-tech smoker or an expensive grill, but in a humble kitchen appliance often overlooked for such a grand culinary feat: the slow cooker.
For decades, the slow cooker, or crockpot, has been a workhorse for busy weeknights, churning out stews and pot roasts with minimal fuss. But its true superpower, its hidden potential, lies in its ability to transform tough cuts of meat into unbelievably tender masterpieces. This isn’t just about convenience; it’s about harnessing a specific scientific process that makes tough collagen fibers yield to unctuous gelatin, resulting in a texture that traditional high-heat methods struggle to achieve without hours of diligent attention.
ADVERTISEMENT
You’re about to discover a method so revolutionary, so profoundly simple, yet so incredibly effective, that it will forever change how you think about cooking ribs. Forget the endless turning, the constant temperature monitoring, the fear of dryness. We’re going to demystify the entire process, revealing insider tips and techniques that will elevate your barbecue game from amateur hour to legendary status. And the best part? It all starts with the humble crockpot. Ready to unlock the secrets to rib royalty? Let’s dive in.
Beyond the Hype: The Science of Slow-Cooked Succulence
Before we even touch a rack of ribs, let’s peel back the curtain and understand *why* the slow cooker is not just a convenient tool, but a scientific marvel when it comes to transforming tough cuts into tender treasures. This isn’t just kitchen folklore; it’s basic chemistry and thermodynamics at play, working silently and powerfully to your advantage. Understanding this fundamental process is key to mastering truly exceptional slow-cooked ribs.
The Magic of Low and Slow: Collagen Transformation Explained
At the heart of every tough piece of meat, especially cuts like ribs, lies a protein called collagen. Collagen is a connective tissue, essentially the glue that holds muscle fibers together. In its raw state, collagen is incredibly strong and firm, making meat tough and chewy. This is precisely why a quick grill or a short bake often results in ribs that stubbornly cling to the bone, resisting all efforts to pull them apart.
Enter the slow cooker. Its genius lies in its ability to maintain a consistently low temperature over an extended period. When collagen is exposed to these gentle, sustained temperatures, typically between 160°F and 205°F (71°C and 96°C), something magical happens. The tough collagen strands begin to break down, slowly but surely, unwinding and dissolving into gelatin. This gelatin is what gives slow-cooked meats their incredible moistness, their silken texture, and that coveted “fall-off-the-bone” quality.
ADVERTISEMENT
Think of it like a meticulous, unhurried massage for your meat. Each hour spent simmering in that controlled environment chips away at the toughness, patiently coaxing out tenderness and richness. This process not only makes the ribs incredibly tender but also allows the flavors of your dry rubs and the base liquid to penetrate deeply into every fiber, creating a depth of taste that simply cannot be replicated by quick cooking methods. The patience factor here is not just a virtue; it’s a culinary superpower, paying off with every juicy, melt-in-your-mouth bite.
Dispelling Myths: Do Ribs Need to Be Boiled First? (The Shocking Answer)
For generations, a common piece of advice for tenderizing ribs has been to boil them before grilling or baking. This technique aims to soften the meat, but often, it does more harm than good. Boiling ribs can strip away precious flavor, leaving you with a watery, diluted foundation that no amount of subsequent seasoning can fully recover. The rapid, high heat of boiling extracts soluble proteins and fats, essentially leaching out the very essence of what makes ribs delicious.
Moreover, boiling often results in a mushy, rather than tender, texture. There’s a fine line between “fall-apart” and “fall-apart-like-baby-food,” and boiling often pushes ribs over that line into the latter. The sudden shock of high heat can also contract muscle fibers, making them less receptive to absorbing later flavors. It’s a quick fix that comes at a significant cost to flavor and texture integrity.
The good news? With the slow cooker, boiling becomes entirely unnecessary – in fact, it’s detrimental. The slow, gentle heat of the crockpot achieves superior tenderness without sacrificing a single ounce of flavor. Instead of boiling, we’ll be building flavor from the ground up, ensuring every stage of the cooking process contributes to an unparalleled taste experience. This fundamental shift in approach is one of the first, and most crucial, steps to unlocking truly exceptional ribs. But that’s just the beginning. Next, we unveil the very soul of your ribs: the ingredients that build the foundation of flavor.
ADVERTISEMENT
The Alchemy of Flavor: Crafting Your Signature BBQ Profile
While the slow cooker does the heavy lifting in terms of tenderness, the true magic of barbecue ribs lies in the symphony of flavors you create. This isn’t just about throwing on some sauce; it’s about a multi-layered approach, from selecting the perfect cut to crafting a dry rub that sings and choosing a sauce that perfectly complements your masterpiece. Each element plays a crucial role, building upon the last to create an unforgettable culinary experience.
Choosing Your Canvas: The Best Ribs for Crockpot Mastery
The journey to perfect ribs begins at the butcher’s counter. While many types of ribs exist, not all are created equal, especially for the slow cooker. Your primary contenders will typically be Baby Back Ribs, Spare Ribs (which include St. Louis Style), and occasionally Country Style Ribs. Each offers a slightly different profile, and understanding their nuances will help you select the ideal foundation for your slow-cooked marvel.
Baby Back Ribs, often sourced from the loin section of the hog, are shorter, leaner, and tend to be more tender due to their proximity to the loin. They cook relatively quickly and are a fantastic choice for those seeking a less fatty, more delicate rib. Spare Ribs, on the other hand, come from the belly section of the hog, closer to the bacon. They are larger, meatier, and contain more fat and connective tissue, which translates to incredibly rich flavor and succulence when slow-cooked. St. Louis Style ribs are simply spare ribs with the breastbone and cartilage trimmed off, creating a more uniform, rectangular shape that’s easier to handle and eat.
For the slow cooker, both Baby Back and St. Louis Style Spare Ribs are excellent choices. The higher fat content of Spare Ribs can yield a slightly richer result, but Baby Backs will still be incredibly tender. Country Style Ribs, interestingly, aren’t technically ribs at all but are cut from the blade end of the loin or shoulder. While delicious, they behave more like a pork chop or steak, lacking the characteristic bone-in rib structure and the deep marbling that renders into that iconic gelatinous texture. For true “fall-off-the-bone” ribs, stick with Baby Backs or Spare Ribs.
ADVERTISEMENT
Look for ribs with good meat coverage, a healthy amount of marbling (streaks of fat within the lean meat), and a fresh, vibrant color. Don’t be afraid to ask your butcher questions; they are a wealth of knowledge and can guide you to the best quality cuts. Remember, the quality of your raw ingredients sets the stage for the final masterpiece, so choose wisely. But even the best ribs need a flavor foundation, and that’s where the magic of the dry rub comes in.
The Dry Rub Revelation: Beyond Just Salt and Pepper
If the ribs are your canvas, the dry rub is the first layer of paint, setting the tone and building the foundational flavors. Forget simply sprinkling on some salt and pepper; a truly exceptional dry rub is a symphony of spices, carefully balanced to enhance, not overpower, the natural richness of the pork. This step is non-negotiable for creating ribs with incredible depth and complexity.
A great dry rub typically incorporates several key components: something sweet (brown sugar, turbinado sugar) for caramelization and balance, something savory (paprika, garlic powder, onion powder, salt), something with a hint of heat (cayenne pepper, black pepper, chili powder), and aromatic elements (cumin, coriander, oregano, mustard powder). The beauty of a dry rub is its versatility; you can customize it to your personal preference, leaning into smoky, spicy, sweet, or earthy notes.
For a basic yet impactful rub, consider a blend of paprika (smoked paprika for an extra dimension), brown sugar, garlic powder, onion powder, salt, black pepper, and a pinch of cayenne. The brown sugar not only adds sweetness but also helps create that beautiful, sticky bark during the final broiling stage. The paprika provides color and a subtle earthiness, while the garlic and onion powders are universal flavor enhancers. Don’t be shy with your application; generously coat every surface of the ribs, massaging the rub into the meat. This isn’t just seasoning; it’s an infusion, allowing the flavors to penetrate deep into the fibers as the ribs slowly cook.
For an even deeper flavor infusion, apply the dry rub and then let the ribs rest in the refrigerator for at least 30 minutes, or even better, overnight. This “marinating” period allows the salt to draw out some moisture from the meat, which then reabsorbs the seasoned liquid, leading to a more profound flavor throughout the ribs. This simple step, often overlooked, can elevate your ribs from delicious to utterly unforgettable. But what about the final flourish? The sauce. Ah, the sauce!
The Sauce Dilemma: Bottled Brilliance or Homemade Harmony?
No discussion of barbecue ribs is complete without the sauce. This thick, luscious coating is often what people remember most, adding that final layer of sticky, sweet, tangy, and sometimes spicy goodness. The great debate often boils down to convenience versus customization: do you opt for a quality store-bought brand, or embark on the rewarding journey of crafting your own?
Store-bought barbecue sauces have come a long way. Many excellent options exist, offering regional styles from Kansas City sweet and smoky to Carolina tangy and vinegary. The main pro here is undeniable convenience; simply open a bottle and you’re good to go. To elevate a store-bought sauce, consider doctoring it up: stir in a spoonful of apple cider vinegar for brightness, a dash of Worcestershire sauce for umami, a pinch of brown sugar for extra sweetness, or a splash of liquid smoke for added depth. A little sriracha or hot sauce can also kick up the heat if that’s your preference. This simple customization can transform an ordinary sauce into something that tastes much more bespoke.
However, the allure of a homemade barbecue sauce is powerful. Crafting your own allows for complete control over the flavor profile, ensuring it perfectly complements your dry rub and your personal taste. You can make it as sweet, spicy, tangy, or smoky as you desire, adjusting ingredients like ketchup, tomato paste, vinegar, molasses, brown sugar, mustard, and a host of spices. There’s a certain pride that comes with serving ribs coated in a sauce you painstakingly created from scratch, and the flavor difference can be truly remarkable. Furthermore, you can even incorporate some of the rendered drippings from the slow cooker into your homemade sauce, adding an unparalleled depth of porky richness.
Regardless of whether you choose bottled or homemade, the sauce is usually applied towards the end of the cooking process, after the ribs are tender from the slow cooker. This allows it to caramelize and become sticky under the broiler or on the grill, creating that irresistible crust. But the secret to perfect ribs isn’t just about the ingredients; it’s about the precision of the method. Next, we break down every single step, from preparation to the final glorious char, ensuring your ribs are nothing short of royalty.
Your Step-by-Step Blueprint to Rib Royalty: The Foolproof Crockpot Method
With your premium ribs and tantalizing dry rub at the ready, it’s time to transform theory into delicious reality. This section is your ultimate guide, a meticulous step-by-step blueprint designed to eliminate guesswork and guarantee success. Every action, no matter how small, contributes to the final masterpiece, so pay close attention to these often-overlooked details. This is where the rubber meets the road, or rather, where the ribs meet the crockpot.
Preparation Perfection: The Often-Overlooked First Steps
Before any spice hits the meat, a couple of crucial preparatory steps will set your ribs up for unparalleled success. These aren’t just suggestions; they are fundamental rituals that separate good ribs from truly great ones. Skipping them might seem tempting for time-saving, but the impact on texture and flavor is profound.
First and foremost is the removal of the membrane, also known as the silverskin. This thin, translucent membrane is found on the boney side of the ribs. If left intact, it becomes tough and chewy when cooked, preventing the ribs from becoming truly tender and fall-off-the-bone. It also acts as a barrier, preventing your delicious dry rub and the cooking liquids from fully penetrating the meat. To remove it, slide a butter knife or the handle of a spoon under the membrane at one end of the rack, usually near a bone. Lift it gently to loosen it, then grab it firmly with a paper towel (it can be slippery!) and pull it cleanly away. It should peel off in one satisfying piece. This simple act transforms the texture of your finished ribs from merely palatable to perfectly melt-in-your-mouth.
Next, assess the fat content. While fat is flavor, excessive thick pockets of hard fat can remain greasy even after slow cooking. Trim any large, hard chunks of fat from the meatier side of the ribs, leaving just enough marbling to contribute to juiciness and flavor. Don’t go overboard; you want some fat for succulence. Finally, consider cutting your full racks of ribs into smaller sections, typically 2-3 bone portions. This not only makes them easier to fit into your slow cooker but also ensures more even cooking and easier handling later on. Plus, it makes portioning for serving a breeze. With these foundational steps complete, your ribs are now primed for flavor infusion.
The Dry Rub Application: A Ritual of Flavor Infusion
With the ribs prepped and ready, it’s time for the true artistry of flavor application. This isn’t just a sprinkle; it’s a generous, loving coating that will seep into every fiber of the meat during the long, slow cook, building a foundational flavor profile that simply can’t be rushed. This step is about commitment and coverage.
Place your prepared rib sections on a large cutting board or baking sheet. Now, take your chosen dry rub and apply it liberally to all sides of the ribs. Don’t be shy! You want a thick, visible layer. Use your hands to gently, but firmly, massage the rub into the meat. Think of it as giving the ribs a spa treatment; you’re working those aromatic spices deep into the muscle fibers, ensuring maximum contact and absorption. Pay particular attention to any crevices or nooks. The goal is to ensure every square inch of meat is coated in this flavor-packed mixture.
Once coated, if time permits, let the ribs sit with the rub on them for at least 30 minutes at room temperature, or even better, cover them loosely and refrigerate for 2-4 hours, or even overnight. This resting period, often referred to as “dry brining,” allows the salt in the rub to draw out moisture from the meat, forming a flavorful brine that is then reabsorbed, leading to deeper seasoning and more tender results. It’s a passive but incredibly effective step that significantly enhances the final product. The longer the rub sits, the more profound the flavor becomes. Now, with your ribs seasoned to perfection, they’re ready for their cozy slow cooker bath.
Arranging for Success: The Crockpot Layout Strategy
Loading your slow cooker might seem like a no-brainer, but there’s a subtle art to arranging your ribs to ensure optimal cooking and tenderness. A strategic layout ensures even heat distribution and maximum flavor development. This isn’t just about fitting them in; it’s about setting them up for success.
First, consider the size and shape of your slow cooker. For most standard oval-shaped crockpots, cutting your ribs into 2-3 bone sections makes them much easier to manage. If using a large, round slow cooker, you might be able to curl a full rack around the edges, but smaller sections are generally more practical. Begin by placing a few pieces of ribs vertically around the perimeter of the crockpot, standing them up on their sides. This creates a foundation. Then, stack additional pieces on top, interweaving them slightly, almost like a carefully constructed log cabin or a Jenga tower.
The goal is to maximize contact with the heat source while still allowing for some air circulation and liquid distribution. Avoid cramming too many ribs in, as overcrowding can lead to uneven cooking and can lower the internal temperature of the slow cooker too much, extending cooking times. Once your ribs are nestled snugly, it’s time for the secret ingredient that ensures ultimate moisture and tenderness: a splash of liquid. While some purists argue against adding any liquid, a small amount – typically about half a cup – can make a significant difference, preventing dryness and contributing to the steamy environment that breaks down collagen.
Good choices for this liquid include apple cider vinegar (for a tangy kick that helps tenderize), apple juice (for sweetness), chicken or vegetable broth (for savory depth), or even a combination. This liquid helps to create a humid environment within the slow cooker, gently steaming the ribs as they cook and ensuring they remain incredibly moist. Now, with everything perfectly positioned, it’s time to let the slow cooker do its thing, embarking on the heart of the cooking process.
The Slow Cooker Cycle: Set It and Forget It (Mostly)
This is where the crockpot truly shines, allowing you to walk away and let time and gentle heat work their magic. While it’s largely a “set it and forget it” process, understanding the nuances of temperature settings and timing will ensure your ribs emerge perfectly tender, every single time. Patience, as always, is a key ingredient here.
You have two primary settings on most slow cookers: Low and High. For ribs, and indeed for most cuts requiring tenderization, the “Low” setting is almost always preferred. Cooking on Low means a longer, more gradual cooking process (typically 6-8 hours for ribs), which allows the collagen to break down more effectively and yields a superior, more consistent texture. The “High” setting cooks faster (typically 3-4 hours), but the increased temperature can sometimes lead to meat that is less evenly tenderized, or even a bit dry on the edges before the center is done. Think of “Low” as a slow, deliberate dance, while “High” is more of a quick sprint – and for tenderness, the dance always wins.
Once you’ve loaded your ribs and added your liquid, simply cover the slow cooker and set it to Low. Resist the urge to lift the lid frequently, as each peek releases accumulated heat and steam, significantly extending the cooking time. Let the aroma be your guide – after a few hours, your kitchen will be filled with the tantalizing scent of slow-cooked barbecue. The ribs are ready when they are incredibly tender, easily pulling away from the bone with very little resistance, but ideally still holding their shape. You shouldn’t need a knife to separate them; a gentle tug with tongs should do the trick.
This hands-off approach makes the slow cooker an invaluable tool for busy schedules, allowing you to prepare a gourmet meal without being tethered to the kitchen. But the journey isn’t quite over yet. While the slow cooker delivers unparalleled tenderness, the final step is crucial for achieving that irresistible caramelized crust and deeply set sauce. This is where we bring in the finishing flourish.
The Grand Finale: Achieving That Perfect Caramelized Bark
Your ribs are now impossibly tender, practically quivering with succulence thanks to the slow cooker. But for that iconic barbecue appearance – a glistening, slightly charred, sticky exterior – a final flourish is absolutely essential. This is where we introduce a burst of high heat, transforming your tender treasures into visual and textural masterpieces. This step is non-negotiable for achieving true rib royalty.
Carefully remove the ribs from the slow cooker. They will be extremely delicate, so use tongs or a spatula to gently transfer them to a baking sheet lined with foil or parchment paper for easy cleanup. Arrange them in a single layer, ensuring they don’t overlap too much. At this point, you can optionally brush them lightly with some of the rendered fat and drippings from the slow cooker (skimmed of excess grease) to further enhance their rich flavor and help the sauce adhere.
Now, it’s time for the sauce. Generously brush your chosen barbecue sauce over the top and sides of each rib section. Be thorough; you want a good, even coating. Preheat your oven broiler to high, or if you have an outdoor grill, preheat it to medium-high. Place the sauced ribs under the broiler, or on the grill, about 6-8 inches from the heat source. Broil for 3-5 minutes, keeping a vigilant eye on them. The sugars in the sauce will quickly caramelize, creating a beautiful, slightly sticky, slightly charred “bark.” If grilling, you’ll get those coveted grill marks and a wonderful smoky aroma.
Flip the ribs once, brush the other side with sauce, and broil/grill for another 3-5 minutes, or until the sauce is bubbly, sticky, and slightly darkened. Watch carefully to prevent burning, as sugary sauces can char quickly. Once done, remove the ribs from the heat and, crucially, allow them to rest for 5-10 minutes. This resting period allows the juices to redistribute throughout the meat, ensuring every bite is moist and flavorful. After resting, your fall-off-the-bone, perfectly sauced, and caramelized crockpot BBQ ribs are ready to be devoured. But what if things don’t go exactly to plan? We’ve got you covered with essential troubleshooting tips.
Troubleshooting & Triumphs: Conquering Common Crockpot Rib Challenges
Even with the most meticulous plan, cooking can sometimes throw a curveball. The good news is that most common crockpot rib challenges have simple, effective solutions. Don’t let a minor hiccup derail your culinary ambitions. Understanding these potential pitfalls and their fixes will equip you with the confidence to tackle any rib-related dilemma, turning potential failures into triumphant successes. Let’s address the most frequent questions and provide you with actionable answers.
“My Ribs Aren’t Fall-Off-The-Bone!” – The Diagnosis and Cure
This is arguably the most common concern when striving for slow-cooked rib perfection. You’ve waited patiently, the aromas have filled your kitchen, but when you go to serve, the meat still clings stubbornly to the bone. The primary culprit here is almost always undercooking. Remember, the “fall-off-the-bone” texture is a direct result of collagen breaking down into gelatin, a process that requires both time and consistent low heat.
If your ribs aren’t as tender as you’d hoped, the simple solution is to return them to the slow cooker and continue cooking. Resist the urge to crank up the heat; stick to the “Low” setting. Add another hour or two, checking for tenderness after each additional hour. Factors that can extend cooking time include using a particularly large or thick rack of ribs, opening the slow cooker lid too frequently (which lowers the internal temperature), or even variations in slow cooker models. Some older models or smaller units might run cooler than others. Trust your instincts and the tenderness test: if they’re not falling off, they simply need more time.
Another less common reason could be the type of ribs. While the slow cooker works wonders on all pork ribs, some leaner cuts might inherently be less “fall-off-the-bone” than fattier ones, though they will still be incredibly tender. Ensure you’ve removed the membrane, as its presence is a guaranteed barrier to true tenderness. Patience is your greatest ally in achieving that elusive, perfectly tender texture. Don’t rush the process, and you’ll be rewarded with ribs that practically melt in your mouth.
“My Sauce is Too Watery!” – Thickening Secrets
You’ve removed your perfectly tender ribs from the slow cooker, but now you’re faced with a pool of delicious, albeit thin, cooking liquid that smells amazing but lacks the desired stickiness for a final sauce. This watery consistency is common, as the ribs release a significant amount of moisture during the long cooking process. Thankfully, thickening this flavorful liquid into a luscious sauce is a simple fix.
First, carefully strain the cooking liquid from the slow cooker into a saucepan. You’ll likely notice a layer of rendered fat on top; use a fat separator or a spoon to skim off as much of this excess fat as possible, leaving behind the rich, flavorful broth. Once skimmed, bring the liquid to a simmer over medium-high heat on the stovetop. Allowing it to simmer will naturally reduce it, concentrating the flavors and thickening it through evaporation. This reduction process alone can often be enough to achieve your desired consistency, especially if you plan to mix in a store-bought BBQ sauce.
For a thicker, more adherent sauce, you can create a cornstarch slurry. In a small bowl, whisk together one tablespoon of cornstarch with two tablespoons of cold water until smooth. Slowly whisk this slurry into your simmering liquid, stirring constantly. Continue to simmer for another 1-2 minutes, allowing the sauce to thicken. The cornstarch will create a glossy, thick consistency that clings beautifully to the ribs. Alternatively, you could stir in extra barbecue sauce directly into this reduced liquid, allowing it to heat through and meld with the savory drippings. This simple technique ensures that not a single drop of flavor goes to waste, turning leftover liquid into liquid gold, ready to coat your magnificent ribs.
“My Ribs Are Dry!” – Moisture Retention Mastery
While the slow cooker is a champion of moisture, it is still possible for ribs to emerge on the drier side if certain factors aren’t accounted for. A dry rib is a sad rib, but fortunately, there are proven strategies to ensure your slow-cooked masterpiece remains incredibly juicy. This challenge often stems from either too little initial moisture or an improper finishing technique.
Firstly, ensure you’ve added at least a small amount of liquid (like apple cider vinegar, broth, or apple juice) to the slow cooker at the beginning of the cooking process. While ribs release their own juices, this initial liquid creates a humid, steamy environment that significantly contributes to overall moisture retention and prevents the meat from drying out, especially around the edges. This is not about boiling, but about creating that gentle, moist heat. Furthermore, avoid lifting the lid too often during the slow cooking cycle, as each time you do, precious steam and heat escape, leading to a less consistent temperature and potentially drier results over the extended cooking time.
The second major factor in dryness can occur during the final broiling or grilling stage. While you want that glorious caramelized bark, excessive time under high heat can quickly dry out the tender meat that the slow cooker worked so hard to create. Watch your ribs *very* carefully during this stage. Broil or grill for just long enough to achieve that sticky, slightly charred exterior – usually no more than 3-5 minutes per side. The goal is to caramelize the sauce, not to cook the meat further. Finally, and crucially, allow the ribs to rest for 5-10 minutes after they come out of the broiler or grill. This resting period allows the juices within the meat to redistribute, ensuring every bite is succulent and flavorful. Cutting into them too soon will cause those precious juices to escape, leading to a drier experience. Master these tips, and say goodbye to dry ribs forever!
The “Too Much Fat” Dilemma: Skimming for Success
When cooking ribs, especially fattier cuts like spare ribs, the slow cooking process will render a significant amount of fat into the cooking liquid. While some fat is essential for flavor and richness, an excessive amount can make your final sauce greasy and unappetizing. Knowing how to efficiently remove this excess fat is a key skill for achieving a balanced, delicious result.
The simplest and most effective method involves chilling the cooking liquid. After carefully removing your tender ribs from the slow cooker, pour the remaining liquid into a heatproof bowl or container. Place it in the refrigerator for at least an hour, or until the fat solidifies and forms a distinct layer on top. Once the fat has congealed, it becomes incredibly easy to skim off with a spoon or a slotted ladle, leaving behind the concentrated, flavorful broth. This method allows you to separate the beneficial savory liquids from the unwanted grease with minimal effort.
If you’re short on time and can’t chill the liquid, you can use a fat separator. This specialized pitcher allows the fat (which is less dense) to rise to the top, while the flavorful liquid settles at the bottom. A spout at the bottom of the pitcher allows you to pour off the lean liquid, leaving the fat behind. Alternatively, a simpler trick involves placing a few ice cubes in the hot liquid. The fat will solidify around the cold ice cubes, making it easier to scoop out. Whichever method you choose, taking the time to remove excess fat will result in a cleaner, richer, and more appealing sauce that truly highlights the deliciousness of your slow-cooked ribs. With these troubleshooting tips in your arsenal, you’re ready to tackle any challenge and move on to truly elevating your rib game with advanced techniques.
Elevating Your Rib Game: Advanced Techniques and Secret Weapons
You’ve mastered the foundational crockpot rib method, creating tender, fall-off-the-bone perfection. Now, it’s time to push the boundaries, to introduce nuances and complexities that will elevate your ribs from merely delicious to truly legendary. These advanced techniques and “secret weapons” are what separate the good home cooks from the true barbecue connoisseurs, adding layers of flavor and authenticity that will leave your guests begging for your recipes. Get ready to impress.
The Smoke Whisperer: Adding a Hint of BBQ Joint Authenticity
One of the defining characteristics of traditional barbecue ribs is that unmistakable smoky flavor, a hallmark of hours spent over smoldering wood. While a slow cooker can’t replicate a full-on smoker, you can absolutely infuse a delightful whisper of smoky authenticity into your crockpot ribs, tricking the taste buds into believing they came straight from a pitmaster’s rig. This is where subtle additions make a significant impact.
The easiest way to introduce smoke is through smoked paprika. Unlike regular paprika, smoked paprika (often labeled “pimentón” from Spain) is made from peppers that have been dried and smoked over oak fires, imparting a deep, earthy, smoky essence. Incorporate a generous amount of smoked paprika into your dry rub. You’ll be amazed at the depth of flavor it provides, creating an illusion of slow-smoked goodness without ever needing an actual smoker. Similarly, a touch of chipotle powder (made from smoked jalapeños) can add both heat and a lovely smoky undertone to your rub or even directly to your BBQ sauce.
For a more pronounced smoky note, consider adding a very small amount of liquid smoke to your cooking liquid in the slow cooker. Liquid smoke is a concentrated natural smoke extract, and a little goes a very long way – often just half a teaspoon or less for a full rack of ribs is sufficient. Too much can taste artificial, but just the right amount can provide that authentic barbecue character. For those with access to an outdoor grill, you can achieve an even more impressive smoke flavor by finishing your slow-cooked ribs on the grill with a few wood chips (applewood or hickory are classic choices) wrapped in foil and placed directly on the coals or over the gas burners. This brief exposure to real smoke during the caramelization stage provides an unparalleled depth of flavor. Become a smoke whisperer, and watch your ribs transform.
Homemade BBQ Sauce: The Ultimate Flavor Signature
While store-bought sauces offer convenience, crafting your own homemade barbecue sauce is the ultimate way to stamp your culinary signature on your ribs. This allows for complete customization, letting you fine-tune the balance of sweet, tangy, spicy, and savory to perfectly match your palate and your dry rub. It’s a creative process that yields incredibly rewarding results, transforming your ribs from merely delicious to truly unforgettable.
A great homemade BBQ sauce starts with a base. Ketchup is the most common foundation, providing a rich tomato backbone. To this, you’ll typically add an acid (apple cider vinegar is superb for tang), a sweetener (brown sugar, molasses, honey, or maple syrup for depth and caramelization), and a touch of heat (cayenne pepper, hot sauce, or a pinch of chili flakes). Beyond these core components, the world of spices is your oyster: garlic powder, onion powder, smoked paprika, cumin, mustard powder, and even a dash of Worcestershire sauce or soy sauce for umami can be incorporated.
Consider the regional styles for inspiration: a Kansas City-style sauce is typically thick, sweet, and tangy; a Carolina sauce leans heavily on vinegar and mustard; and a Memphis-style might incorporate more dry rub flavors into its base. The real secret weapon for a homemade sauce, however, lies in the slow cooker drippings. After you’ve cooked your ribs and skimmed the fat, reduce this liquid gold down on the stovetop. This concentrated porky essence can then be incorporated into your homemade BBQ sauce, adding an unparalleled depth of flavor and a natural richness that no bottled sauce can ever achieve. This fusion of the cooking liquid with your custom sauce is a masterstroke, binding the entire flavor profile of your ribs into one cohesive, utterly delicious experience. Experiment, taste, and adjust until you create your ultimate flavor signature.
The Overnight Marinade: Deeper Flavor, Less Fuss
For those who plan ahead, an overnight marinade can take your slow-cooked ribs to an entirely new level of flavor depth. This simple, passive step requires minimal effort but yields maximum impact, allowing the dry rub’s seasonings to penetrate deep into the meat fibers, creating a truly integrated flavor profile. This isn’t just about surface seasoning; it’s about infusing the very core of the ribs.
After you’ve performed the essential preparation steps – removing the membrane and trimming any excess fat – apply your dry rub generously to all sides of the rib sections. Ensure every surface is coated, and gently massage the rub into the meat. Once thoroughly coated, arrange the seasoned ribs in a single layer on a baking sheet, or stack them in an airtight container. Cover them loosely with plastic wrap or a lid, and refrigerate them overnight, or for a minimum of 8-12 hours. Some pitmasters even swear by a 24-hour dry brine for optimal results.
During this extended resting period, a phenomenon called “dry brining” occurs. The salt in your rub draws moisture from the meat’s surface. This moisture then mixes with the spices, creating a concentrated, flavorful liquid that is subsequently reabsorbed by the meat through osmosis. This process not only tenderizes the meat further by breaking down some proteins but also ensures that the flavor of your dry rub is distributed throughout the rib, rather than just sitting on the surface. When you finally transfer the marinated ribs to the slow cooker, they’ll already be bursting with flavor, setting the stage for an even more profound culinary experience. This simple step is a true “insider tip” that consistently delivers superior results with minimal active effort, making it a powerful secret weapon for your rib mastery.
Pairing Perfection: What to Serve with Your Masterpiece
You’ve crafted the perfect crockpot BBQ ribs, a masterpiece of tenderness and flavor. Now, to complete the ultimate meal experience, it’s essential to consider what best accompanies such a star. The right side dishes don’t just fill the plate; they complement, contrast, and elevate the main event, creating a harmonious and unforgettable feast. Think beyond the ordinary and build a plate that celebrates your culinary triumph.
Classic barbecue sides are classics for a reason: they work beautifully with rich, saucy ribs. Creamy coleslaw provides a refreshing crunch and a tangy counterpoint to the richness of the pork. Fluffy cornbread, perhaps with a touch of sweetness, is perfect for sopping up every last drop of that delectable sauce. Creamy mashed potatoes or a hearty potato salad offer comforting starch, while baked beans, slow-cooked with molasses and bacon, mirror the deep, savory notes of the ribs themselves. These traditional pairings create a sense of comforting familiarity and perfectly balance the meal.
For those looking to expand their horizons, consider unexpected yet delightful pairings. A vibrant green salad with a light vinaigrette can cut through the richness, offering a crisp, fresh contrast. Roasted vegetables like asparagus, broccoli, or corn on the cob provide additional texture and natural sweetness. For drinks, a crisp, cold beer (a lager or a pale ale) or a glass of dry rosé wine can beautifully complement the savory and sweet notes of the ribs, cleansing the palate between bites. For non-alcoholic options, sweet tea or homemade lemonade are quintessential barbecue beverages.
The key is balance. Ribs are hearty and robust, so aim for sides that offer contrast in texture, temperature, and flavor profile. Don’t let your magnificent ribs be overshadowed by bland accompaniments. Curate a supporting cast of dishes that truly make your rib feast a symphony for the senses. But what happens after the feast? How do you ensure your hard work lives on, ready for an encore? Let’s talk about storage and sustainability.
Beyond the Feast: Storage, Reheating, and Sustainable Rib Practices
The joy of perfectly cooked ribs doesn’t have to end with the last delicious bite. Leftovers, when handled correctly, can be just as satisfying, allowing you to extend the pleasure of your culinary creation. Furthermore, in today’s conscious kitchen, considering the sustainability and ethical sourcing of your ingredients is an increasingly important aspect of being a responsible cook. This section addresses both the practicalities of preserving your masterpiece and the broader implications of how you source your protein.
The Art of Leftovers: Keeping Ribs Delicious
If by some miracle you have leftover ribs (a rare occurrence for crockpot ribs, given their addictive quality!), proper storage is key to maintaining their deliciousness and ensuring food safety. The goal is to keep them moist and flavorful for future enjoyment, avoiding the dreaded dry, rubbery reheat.
Allow the cooked ribs to cool down to room temperature within two hours of cooking. Once cool, transfer them to an airtight container. If you have extra sauce, you can either store it separately or lightly coat the ribs in it before storing, which helps retain moisture. Place the airtight container in the refrigerator, where the ribs will remain fresh and delicious for 3-4 days. For longer storage, freezing is an excellent option. Wrap individual rib portions tightly in plastic wrap, then again in aluminum foil, or place them in freezer-safe bags, removing as much air as possible to prevent freezer burn. Properly frozen ribs can maintain their quality for up to 2-3 months. Label with the date to keep track.
The beauty of slow-cooked ribs is that their tenderness holds up exceptionally well, even after refrigeration or freezing. When you’re ready for an encore, you’ll find that with the right reheating method, they can be nearly as good as fresh. This foresight in storage means you can enjoy the fruits of your labor long after the initial feast, turning one cooking session into multiple opportunities for culinary delight. But reheating is an art form in itself, requiring a gentle touch to preserve that coveted tenderness.
Reheating Without Ruining: The Secret to Second-Day Success
Reheating ribs can be a perilous journey. The tender, juicy perfection you achieved with your slow cooker can easily turn into dry, tough disappointment if not handled with care. The secret to second-day success lies in using gentle, indirect heat that allows the ribs to warm through without sacrificing their hard-won moisture and tenderness. Forget the microwave for anything more than a quick, emergency snack; it’s the enemy of juicy ribs.
The best method for reheating ribs, especially larger portions, is the oven. Preheat your oven to a moderate temperature, around 250-300°F (120-150°C). Place your leftover ribs (you can add a splash of water, broth, or extra BBQ sauce to the bottom of the pan to create some steam) in a baking dish, cover tightly with aluminum foil, and warm for 20-30 minutes, or until heated through. The foil traps the steam, keeping the ribs moist. For a slight refresh of that caramelized exterior, you can remove the foil for the last 5 minutes. This method is slow, gentle, and remarkably effective at preserving tenderness.
For a quicker, equally effective method, especially for just a few ribs, an air fryer works wonders. Preheat your air fryer to 300°F (150°C). Place the ribs in the basket in a single layer, ensuring they don’t overlap. Reheat for 8-12 minutes, flipping halfway through, until warmed through. The air fryer circulates heat, creating a beautifully crispy exterior while the interior remains moist. Avoid the microwave if possible, as its rapid, uneven heating tends to dry out meat and make it rubbery. By choosing the right reheating method, you can relive the glory of your slow-cooked ribs, ensuring that second meal is just as satisfying as the first. This approach minimizes waste and maximizes enjoyment, extending the value of your culinary efforts.
Sustainable Sourcing: Making Responsible Rib Choices
As home cooks, our choices at the butcher shop or supermarket have a significant impact on animal welfare, environmental health, and even the quality of the food we consume. When it comes to something as central as ribs, making sustainable and ethical sourcing decisions isn’t just a trend; it’s a responsible practice that aligns with creating truly high-quality, conscious cuisine. Choosing your meat wisely can enhance both your meal and your peace of mind.
Firstly, consider “pasture-raised” or “heritage breed” pork. Pigs raised outdoors on pastures, with access to natural foraging, often lead healthier lives and produce meat with superior flavor and texture. While these options might be slightly more expensive, the difference in quality is often discernible, and you’re supporting more humane and environmentally friendly farming practices. Look for certifications that indicate humane treatment, organic feeding, and sustainable land management. These certifications vary by region (e.g., “Certified Humane,” “Animal Welfare Approved” in the USA; “RSPCA Assured,” “Red Tractor” in the UK).
Secondly, seek out local butchers and farmers’ markets. Building a relationship with a local butcher allows you to ask questions about the origin of their meat, their farming practices, and even specific cuts. Local sourcing often means less transportation, reducing the carbon footprint, and supporting your local economy. Farmers at markets can provide direct insight into how their animals are raised, offering a level of transparency rarely found in large supermarkets. They might even offer less common cuts that could inspire future culinary adventures.
Lastly, consider the concept of “nose-to-tail” eating. While you’re focusing on ribs, understanding that consuming various parts of the animal reduces waste is part of a sustainable ethos. By making informed choices, you’re not just buying meat; you’re supporting a system that values animal welfare, environmental stewardship, and ultimately, better-tasting food. Your delicious crockpot ribs can be a testament not only to your culinary skill but also to your commitment to a more sustainable and ethical food system. This conscious choice completes the journey, from preparation to responsible consumption, making your ribs not just a meal, but a statement.
The Psychological Power of Perfect Ribs: More Than Just a Meal
Beyond the tender meat and the sticky, sweet sauce, there’s a deeper, almost primal satisfaction that comes with creating and sharing perfectly cooked ribs. It’s more than just a meal; it’s an experience, a connection, a testament to patience and care. The psychological impact of serving truly phenomenal ribs extends far beyond the plate, touching on themes of comfort, celebration, and genuine human connection. This isn’t just about feeding people; it’s about nurturing souls and creating lasting memories.
Think about the reactions when you present a platter of these fall-off-the-bone beauties. The “oohs” and “aahs,” the wide eyes, the immediate reaching for a piece. It’s a moment of collective delight, a shared experience of pure gastronomic pleasure. Food, especially comfort food like ribs, has an incredible power to bring people together, to forge bonds over shared enjoyment. Whether it’s a family dinner, a gathering with friends, or a quiet meal for two, the act of sharing such a lovingly prepared dish creates an atmosphere of warmth and generosity.
Furthermore, there’s immense personal satisfaction in mastering a dish that many find intimidating. The journey from tough, chewy ribs to tender perfection is a culinary triumph. It builds confidence in the kitchen, encourages further experimentation, and proves that with the right guidance and a little patience, you can achieve extraordinary results. This sense of accomplishment is a reward in itself, a silent nod to your growing culinary prowess. You didn’t just cook ribs; you transformed them, showcasing your dedication and skill.
The aroma that fills your home, the anticipation as they finish under the broiler, the first bite that confirms their perfect tenderness – these are sensory triggers that create powerful, positive memories. Food is often intertwined with our fondest recollections, and these ribs have the potential to become a cornerstone of your family’s culinary traditions. They are a symbol of effort, love, and the simple joy of creating something truly delicious for those you care about. So, as you savor each bite, remember that you’re not just eating; you’re engaging in a rich tapestry of experience, connection, and triumph. We encourage you to share your own crockpot rib triumphs and tips in the comments below – what’s your secret ingredient? What was your biggest challenge, and how did you overcome it? Let’s build a community of rib masters!
Your Journey to Rib Mastery Begins Now: A Final Call to Action
You now possess the complete blueprint, the hidden insights, and the troubleshooting wisdom to transform humble pork ribs into a legendary culinary experience using nothing more than your trusty slow cooker. We’ve peeled back the layers, from the scientific marvel of collagen breakdown to the meticulous artistry of dry rubs and sauces, culminating in a dish that consistently delivers on the promise of fall-off-the-bone perfection.
This isn’t just a recipe; it’s a masterclass, a guide to confidence in your kitchen, empowering you to create a dish that will elicit gasps of delight and requests for encores. Forget the fear of dry, tough, or bland ribs. You are now equipped with the knowledge to consistently produce ribs that are incredibly tender, bursting with flavor, and effortlessly melt in your mouth. The path to rib royalty is no longer a distant dream but a clear, actionable journey you can embark on today.
The beauty of the crockpot method lies in its simplicity and reliability, allowing you to achieve gourmet results with minimal fuss. It frees you from constant vigilance, letting the magic happen slowly and steadily, culminating in a dish that feels both effortlessly luxurious and deeply comforting. So, what are you waiting for? Head to the butcher, gather your ingredients, and set your slow cooker. The aroma that will soon fill your home, and the joyous reactions of your diners, will be your ultimate reward.
Don’t just read about perfection; create it. Your journey to becoming a true rib master starts the moment you decide to put these techniques into practice. And this is just the beginning. The slow cooker holds a world of culinary wonders waiting to be unlocked, and this mastery of ribs is merely the first delicious step in a lifetime of slow-cooked triumphs. Stay tuned for more culinary adventures, because once you taste what the crockpot can do, you’ll never look back.